The Bluetooth-Controlled Arm (BCA) 1.0
16 minute read
For my final project, I built a robotic arm that can be controlled via a glove. Such a robotic arm can be modified to handle tools and such during surgery, as well as countless other endeavors. This robot would also be great for other applications like annoying my little brother remotely, and can be a stepping stone to more advanced gesture-controlled robots. I originally wanted to use soft robotics as a part of the robot it was not possible due to the fact that any one actuator takes ~16 hours to make, giving no room for trial and error given my short time frame. However, I want to pursue that afterwards.
Parts
Parts not in the kit: My professors were able to send me laser cuts of a robotic CAD model I found from Thingiverse (thank you again!). I borrowed most of my materials (flex sensors, bluetooth modules, etc.) either from Amazon overnight shipping (it's free shipping! How is this free??) or from my friends who have lot of different gizmos and sensors. Notably, the things that weren't in the kit that I used were 5 regular-sized servos, 2 accelerometers, 3 Adafruit flex sensors, 1 PCA9685 servo driver, and 2 HC-05 bluetooth modules.
Parts in the kit: 2 mini-servos, 1 Metro M0 microcontroller, 1 ESP32 Huzzah Board (Adafruit Feather), a 9V battery to power the glove, and a battery pack to power the servo driver.
How it Works
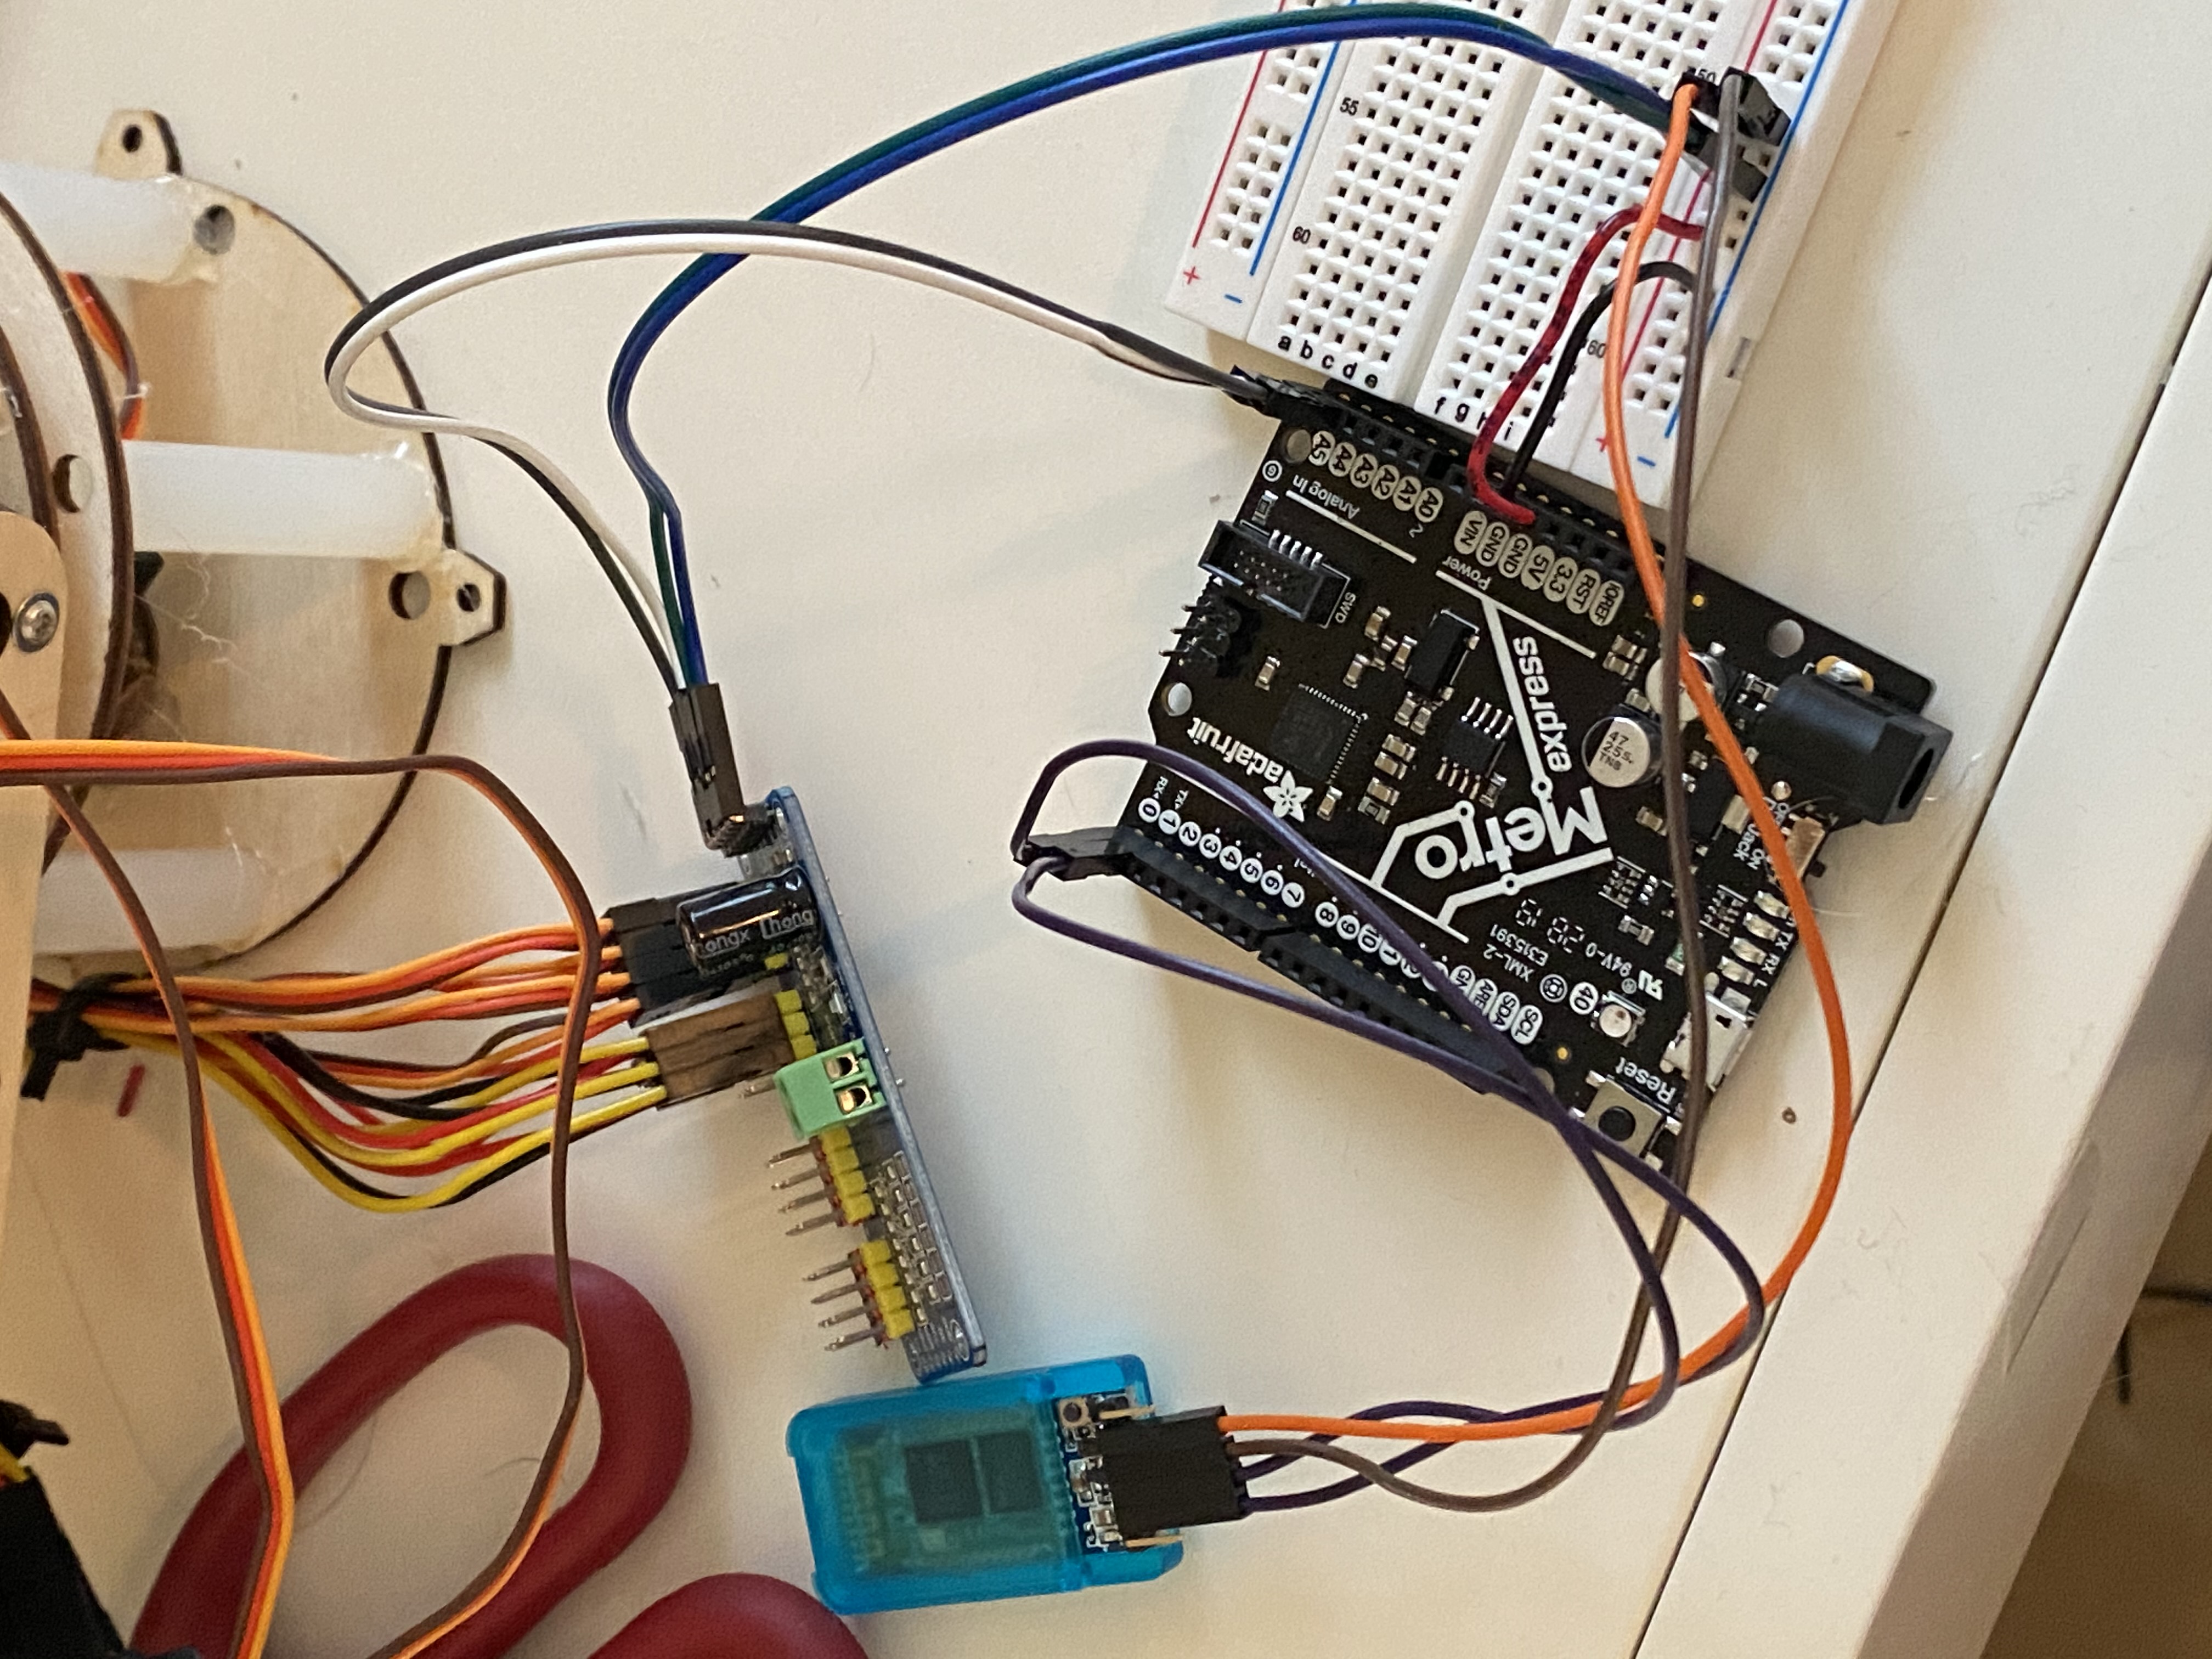
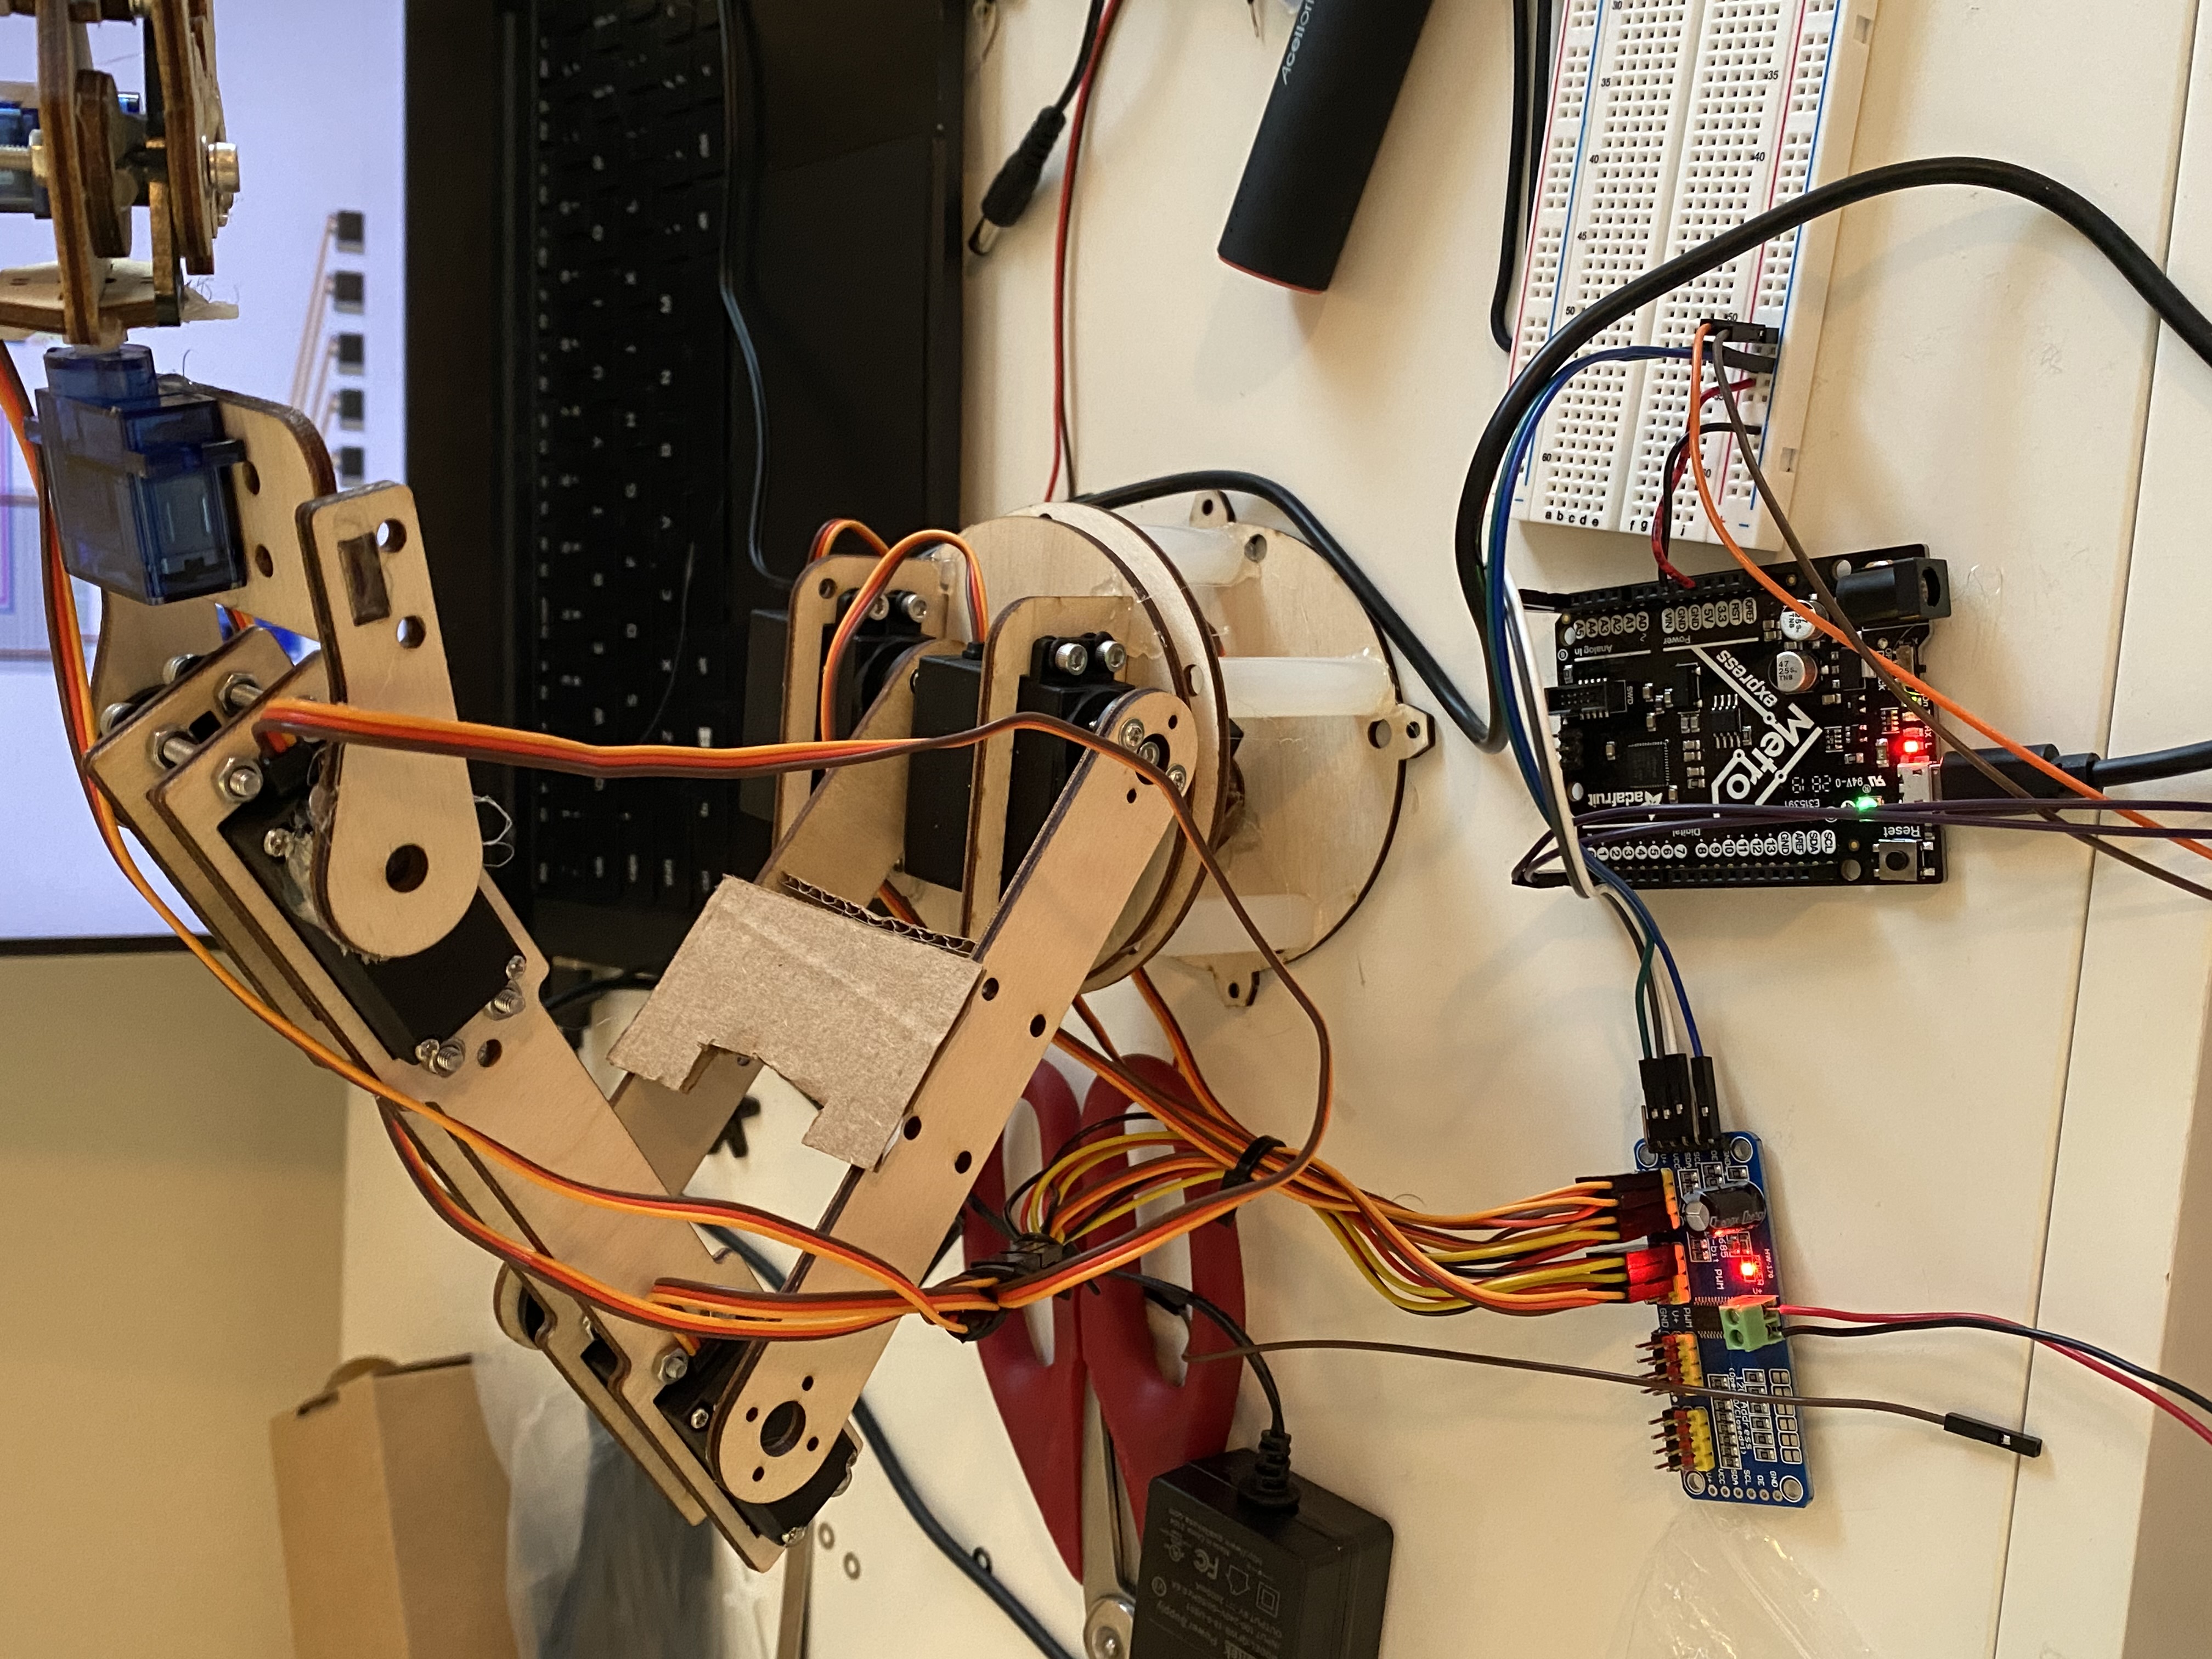
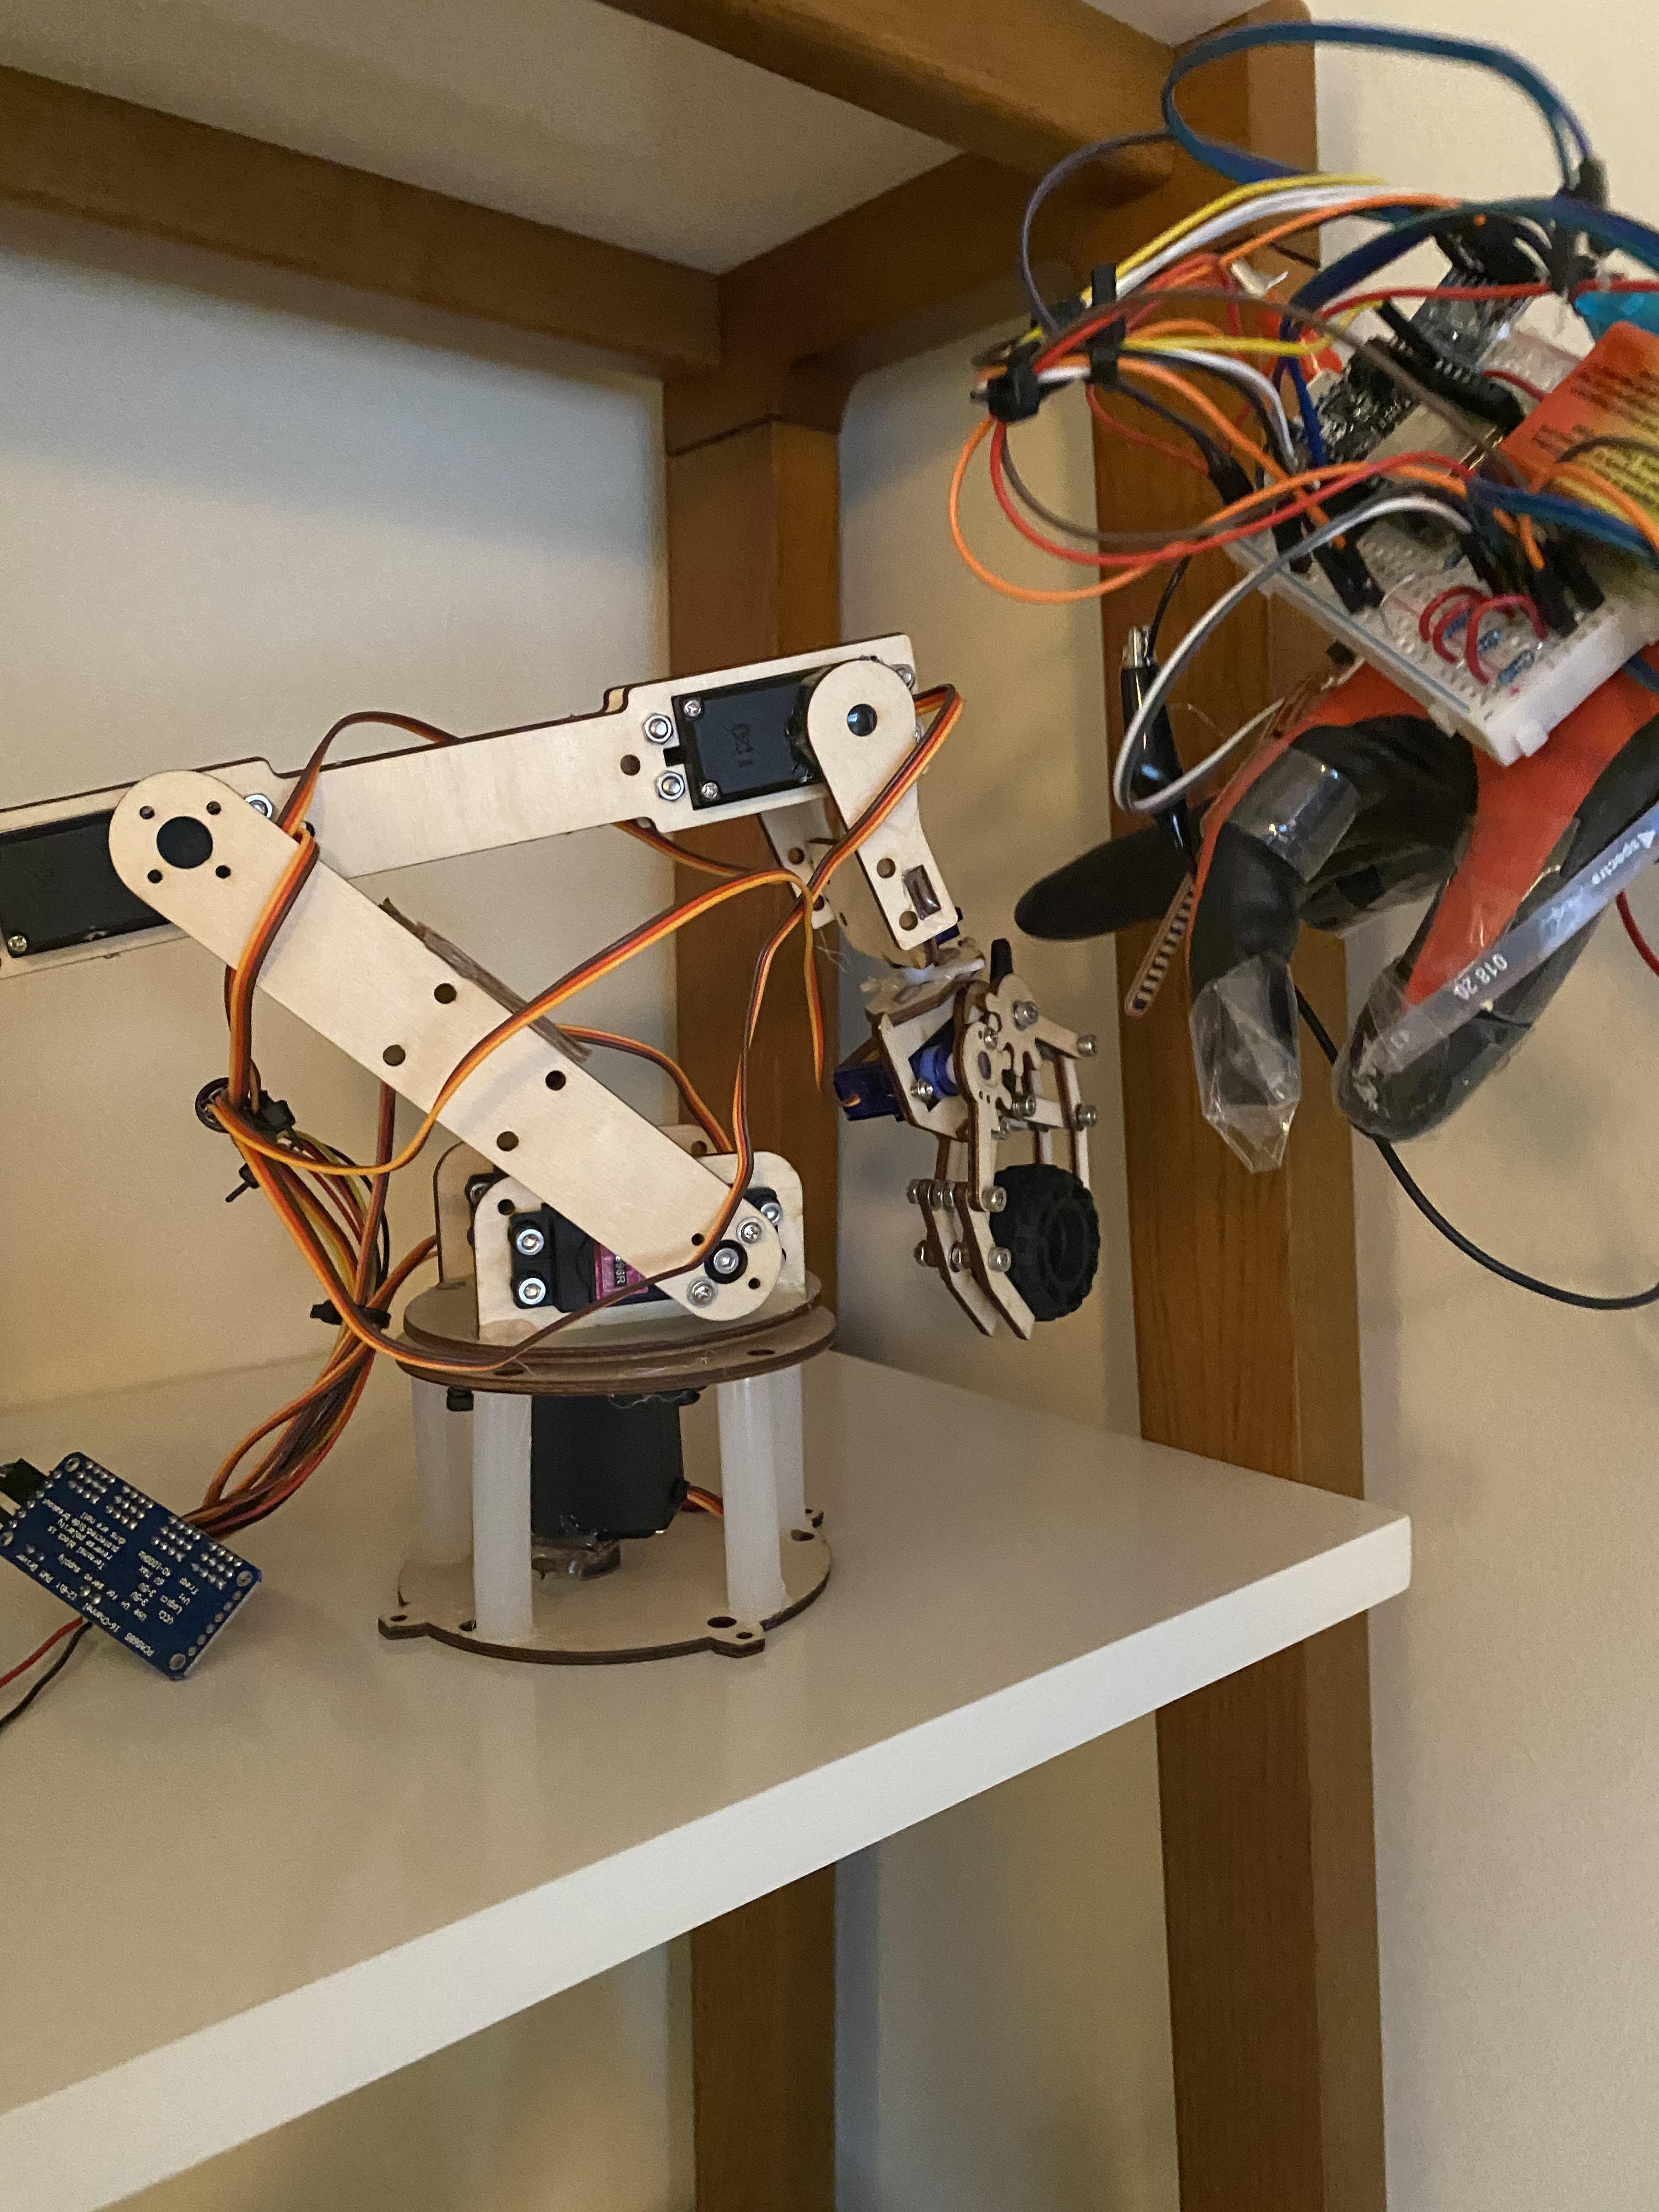
The arm: Each servo corresponds to one degree of movement of the robotic arm (except for the "shoulder" ones, where there are two servos corresponding to one degree of movement). These servos are controlled by a servo motor board which simplifies the wiring which would otherwise get very messy.
The glove: The glove uses 2 accelerometers to calculate rotation of the wrist and bending of the elbow, and then uses 3 flex sensor to determine the bending. These are then sent to the hand via the bluetooth in the form of characters, as shown in the demo video. This is done at a rate of 4800 baud.
The code: The code (adapted from online) is pretty much as explained in the demo video -- the glove sends signals via bluetooth in the form of characters. When these are received by the arm, the code reads that and executes the movement based on what character it receives (e.g. F/f controls the extension/retraction of the gripper arm). Like most things, it's quite simple conceptually but a bit harder to implement in reality. My code is linked below, although I would suggest you code your arm from scratch because I basically had to do that considering all of the different calibration changes I had to implement.
Robotic Arm Code (Again, if you are building your own, I'd just recommend coding it from scratch than referencing mine, because your model will guaranteed be different than mine.)
Construction
This project took a lot longer to make than I expected, mostly because I kept running into unexpected problems left and right. One problem I encountered was my HC-05 bluetooth modules being plugged into the wrong hole by accident and ruining the entire thing. Although, I cannot tell what was the actual issue behind the bluetooth module error because even with the "incorrect" wiring the circuit should have been fine. Regardless, that took lots of time to solve. Another issue I encountered was that I was missing materials, mainly bearings and of course, new bluetooth modules since one I had was broken. I also tried making a gripper out of Ecoflex (documentation on my molding and casting page) but it was too heavy to be supported by the arm. Coding-wise, the biggest issue was calibration, since any wrong calculation could potentially destroy my arm by causing the servos to overextend into themselves. One time it almost did, my arm was lucky that I almost instantly unplugged it because it would have been a disaster. On top of that, due to personal issues (I was moving) I only had four days (plus a three day extension) to fully complete my project. However, I finally managed to succeed. See the image gallery below for a more in-depth process.
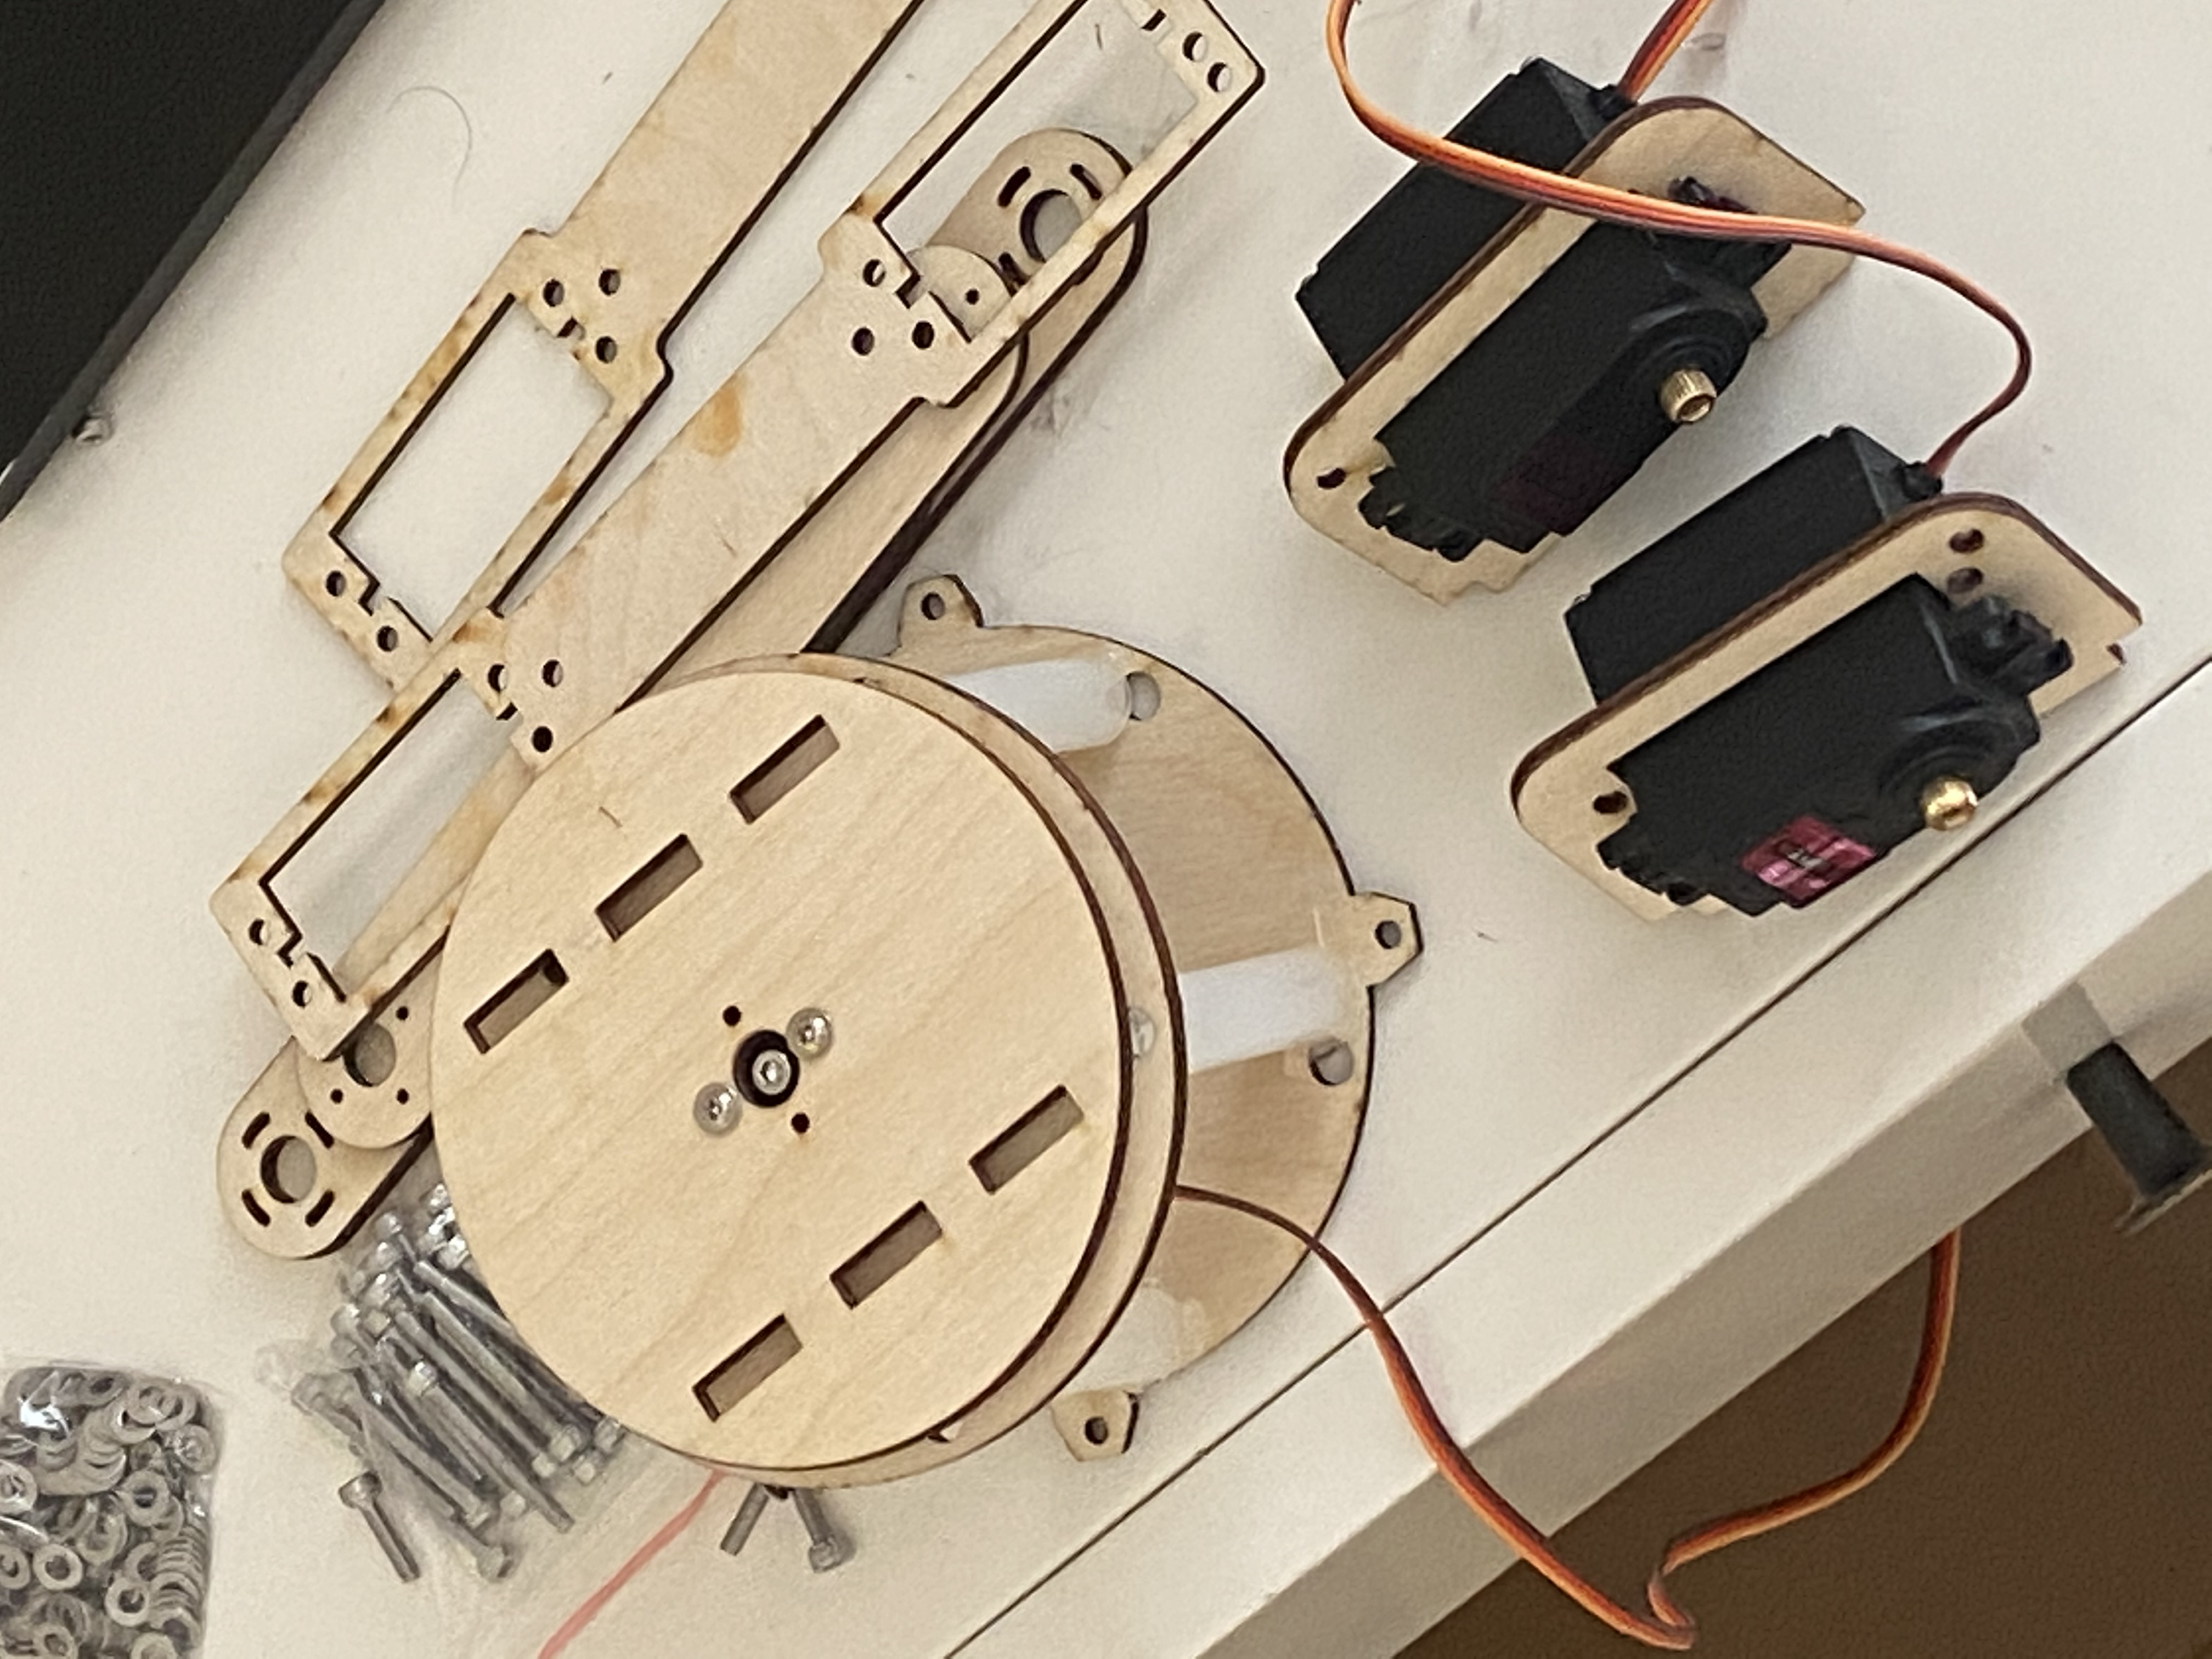
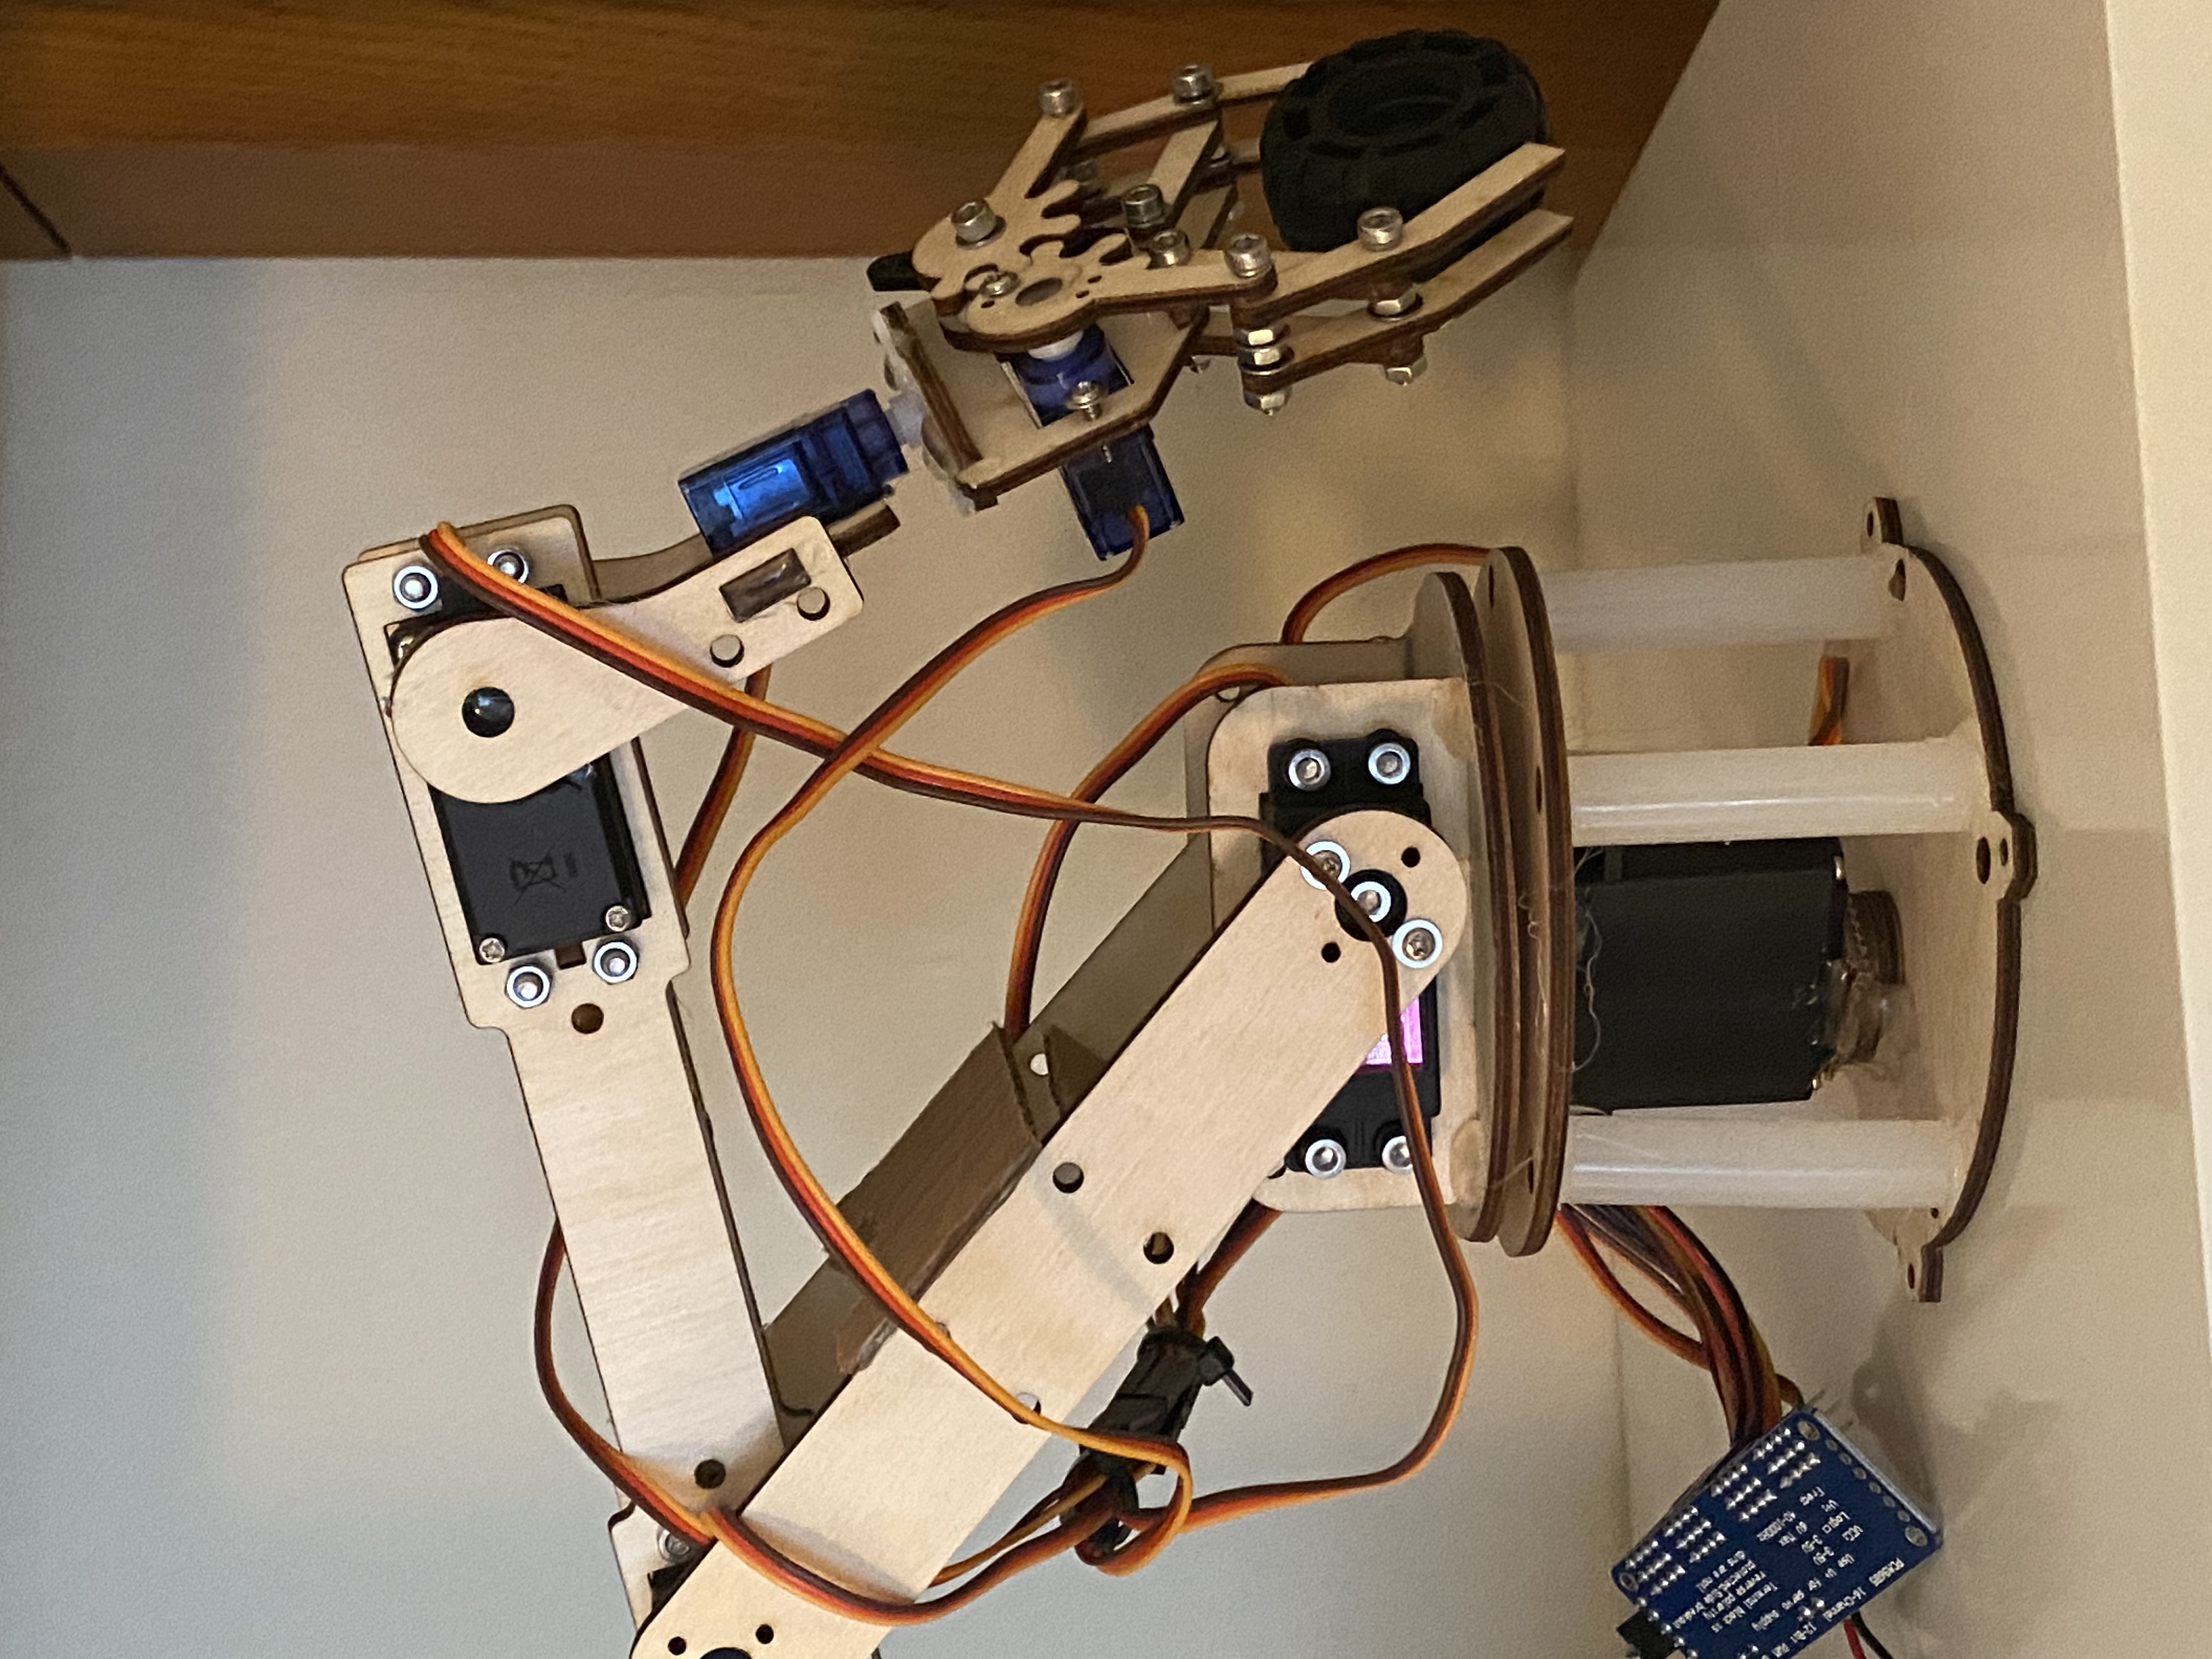
I started building the base. I just cut hot glue gun sticks in half to create the bearings, which I glued on with (ironically) more hot glue. This is controlled by one servo. You can also see some more of the lasercut parts in the background.
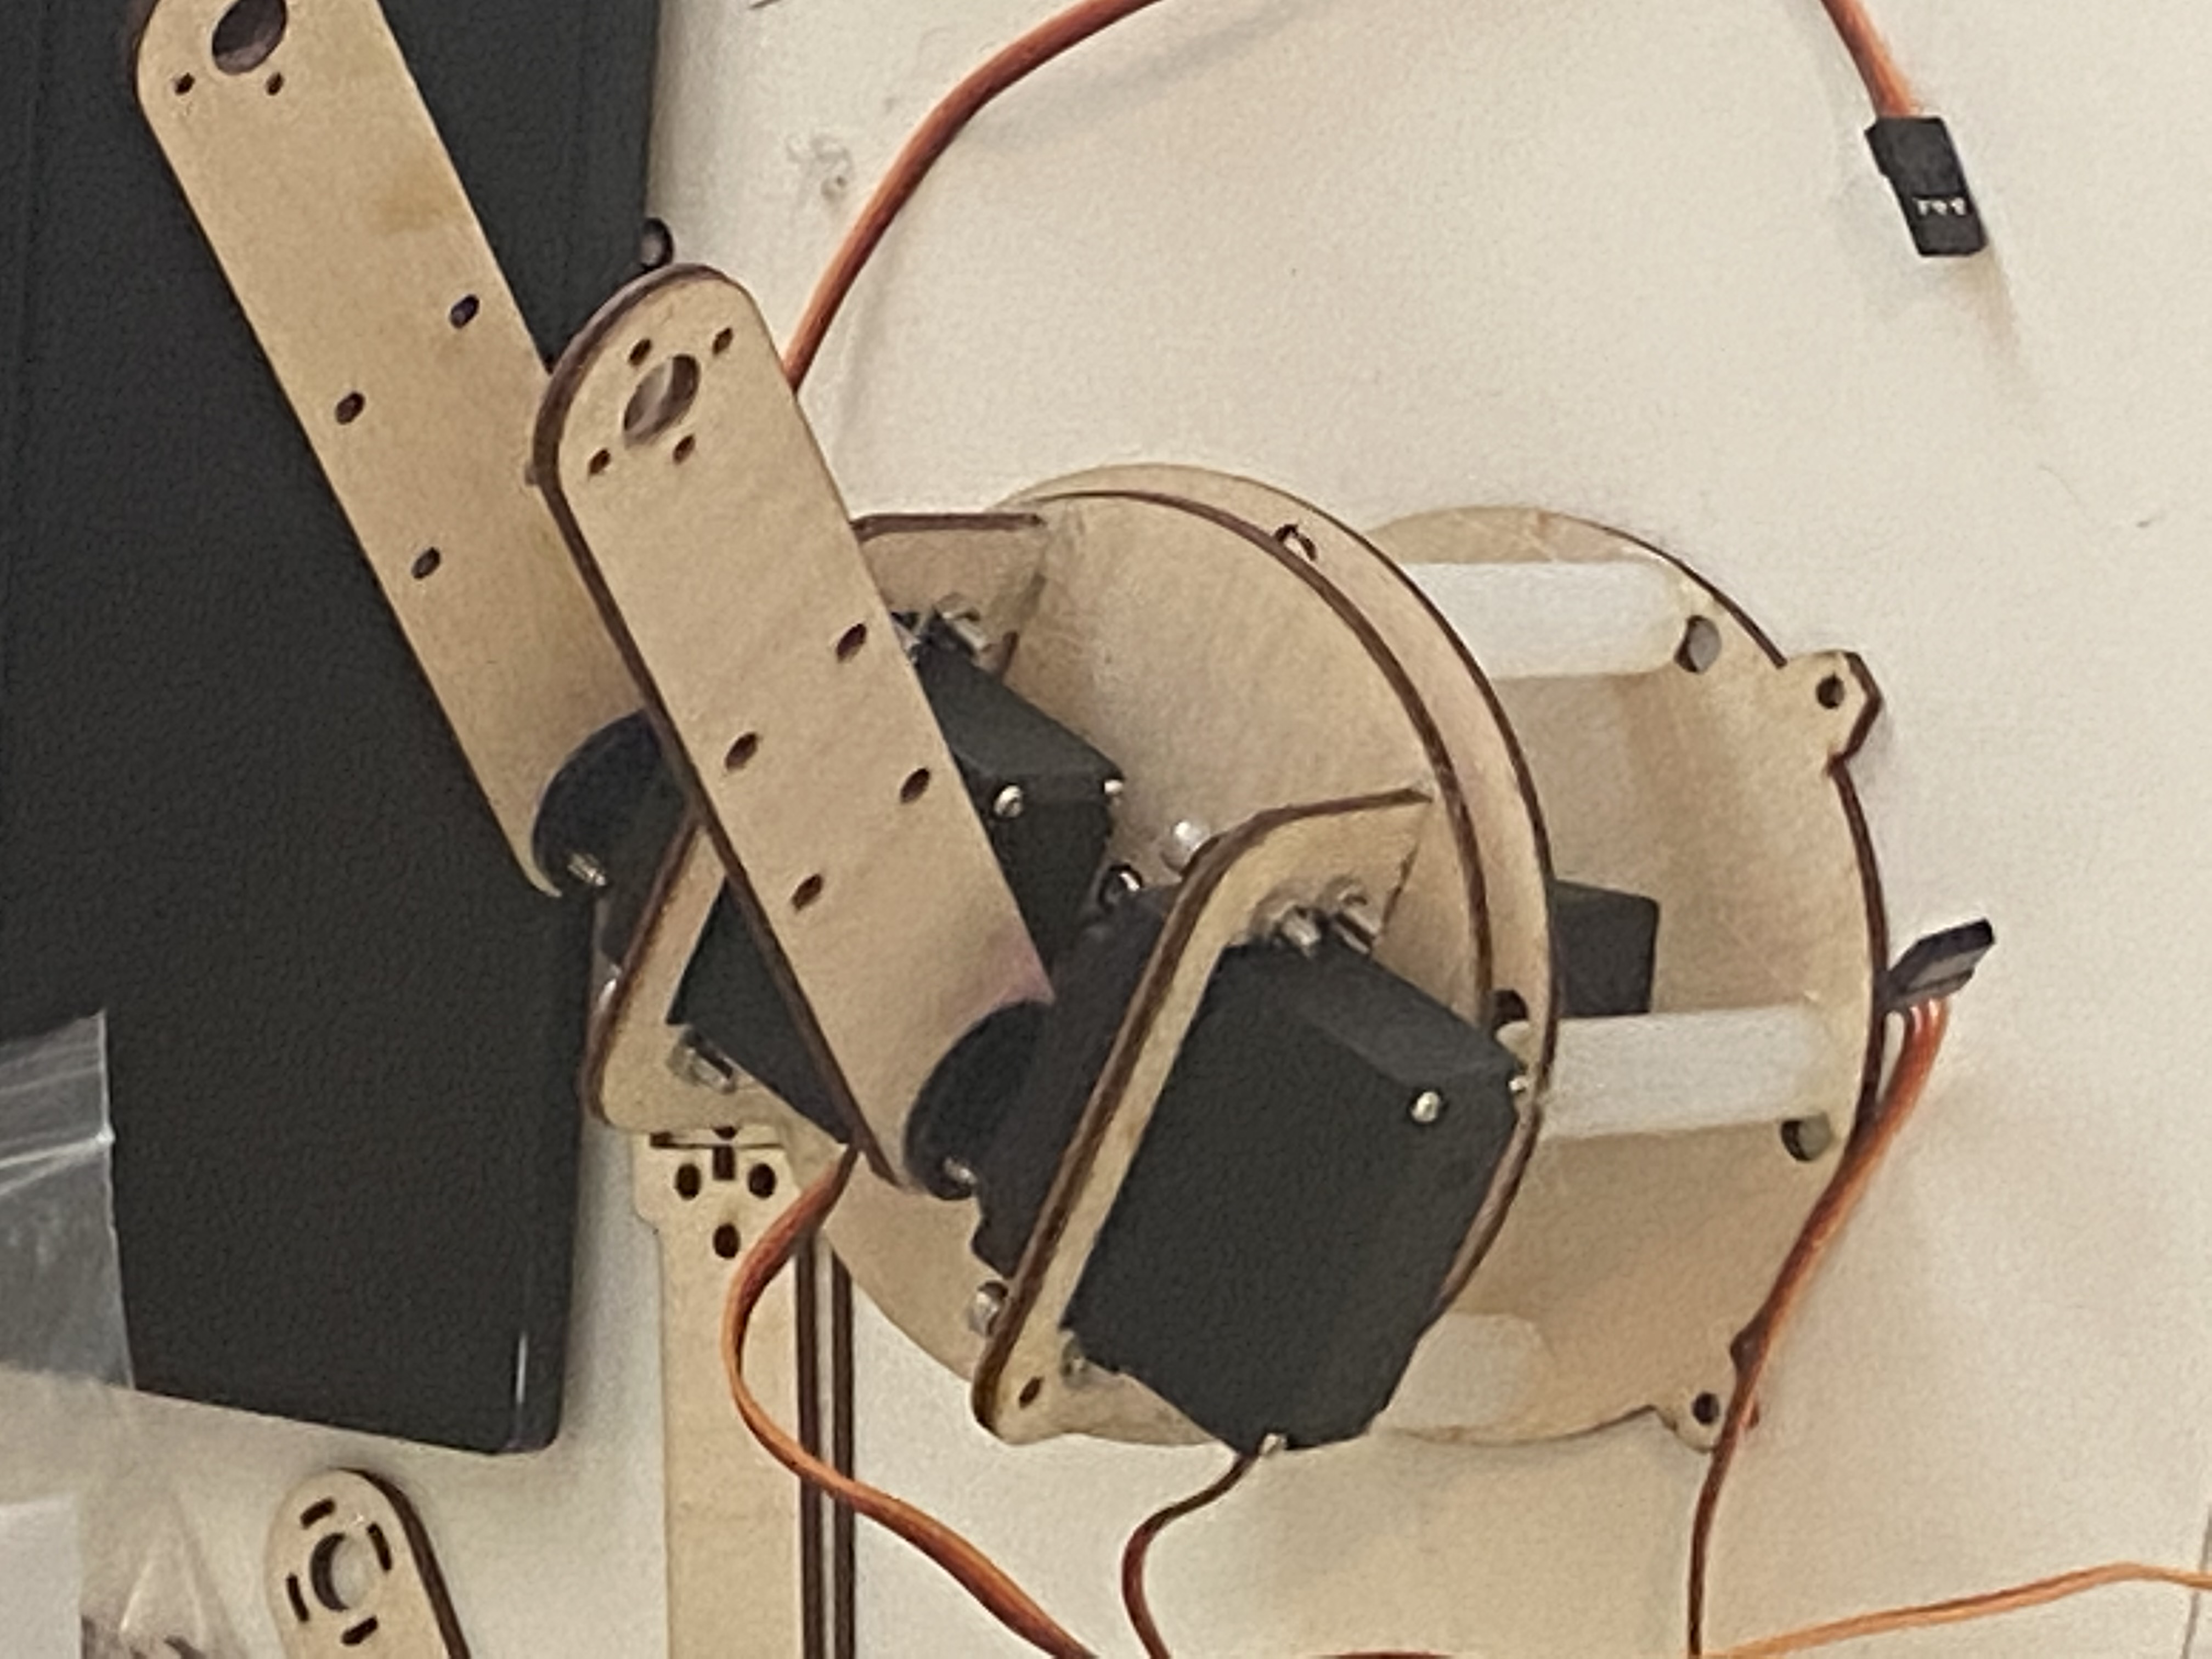
Here I started building the shoulder. I later added spacers (which was just cardboard), but here you can see the way they attach onto the servos. This part was the most difficult to calibrate since there were two servos controlling the same part.
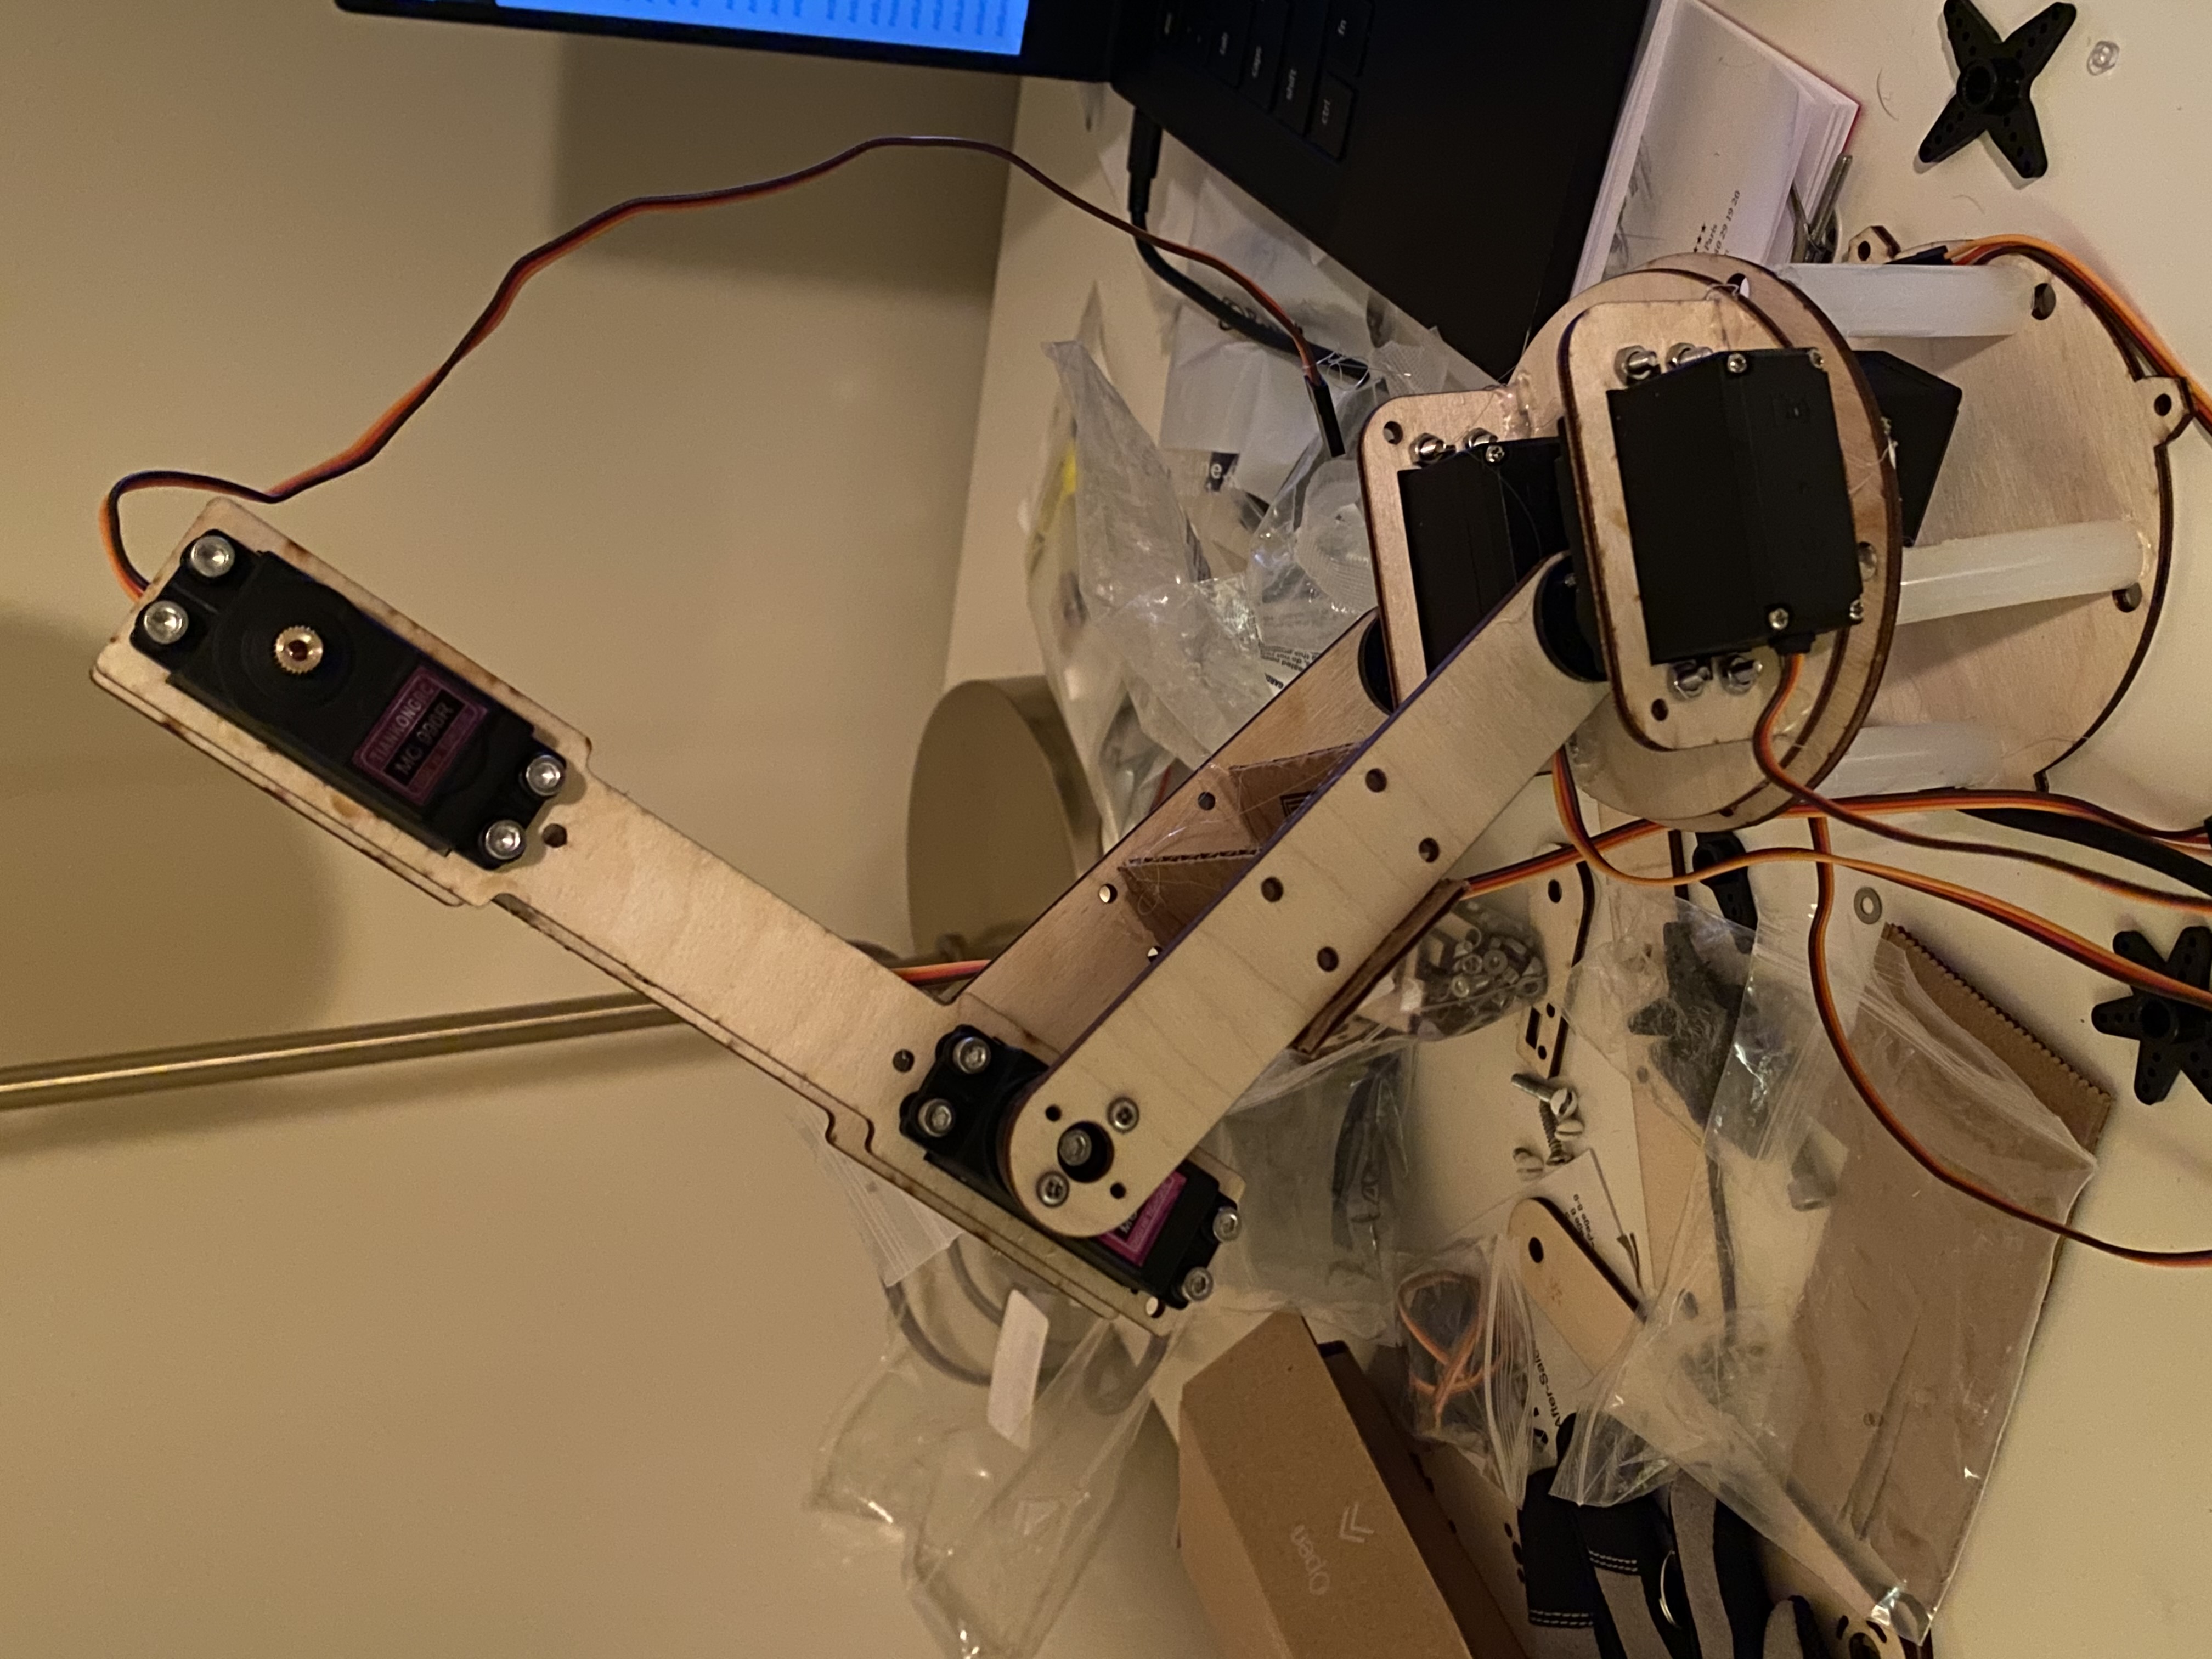
Here I start building the elbow. I used cardboard and long M3 bolts as bootleg spacers, which worked surprisingly. Originally, I used one of the bearings from the kit as a bearing for the opposite side of the servo, but I eventually replaced it with a 3d printed bearing from the Thingiverse file. Please also ignore the mess behind the photo.
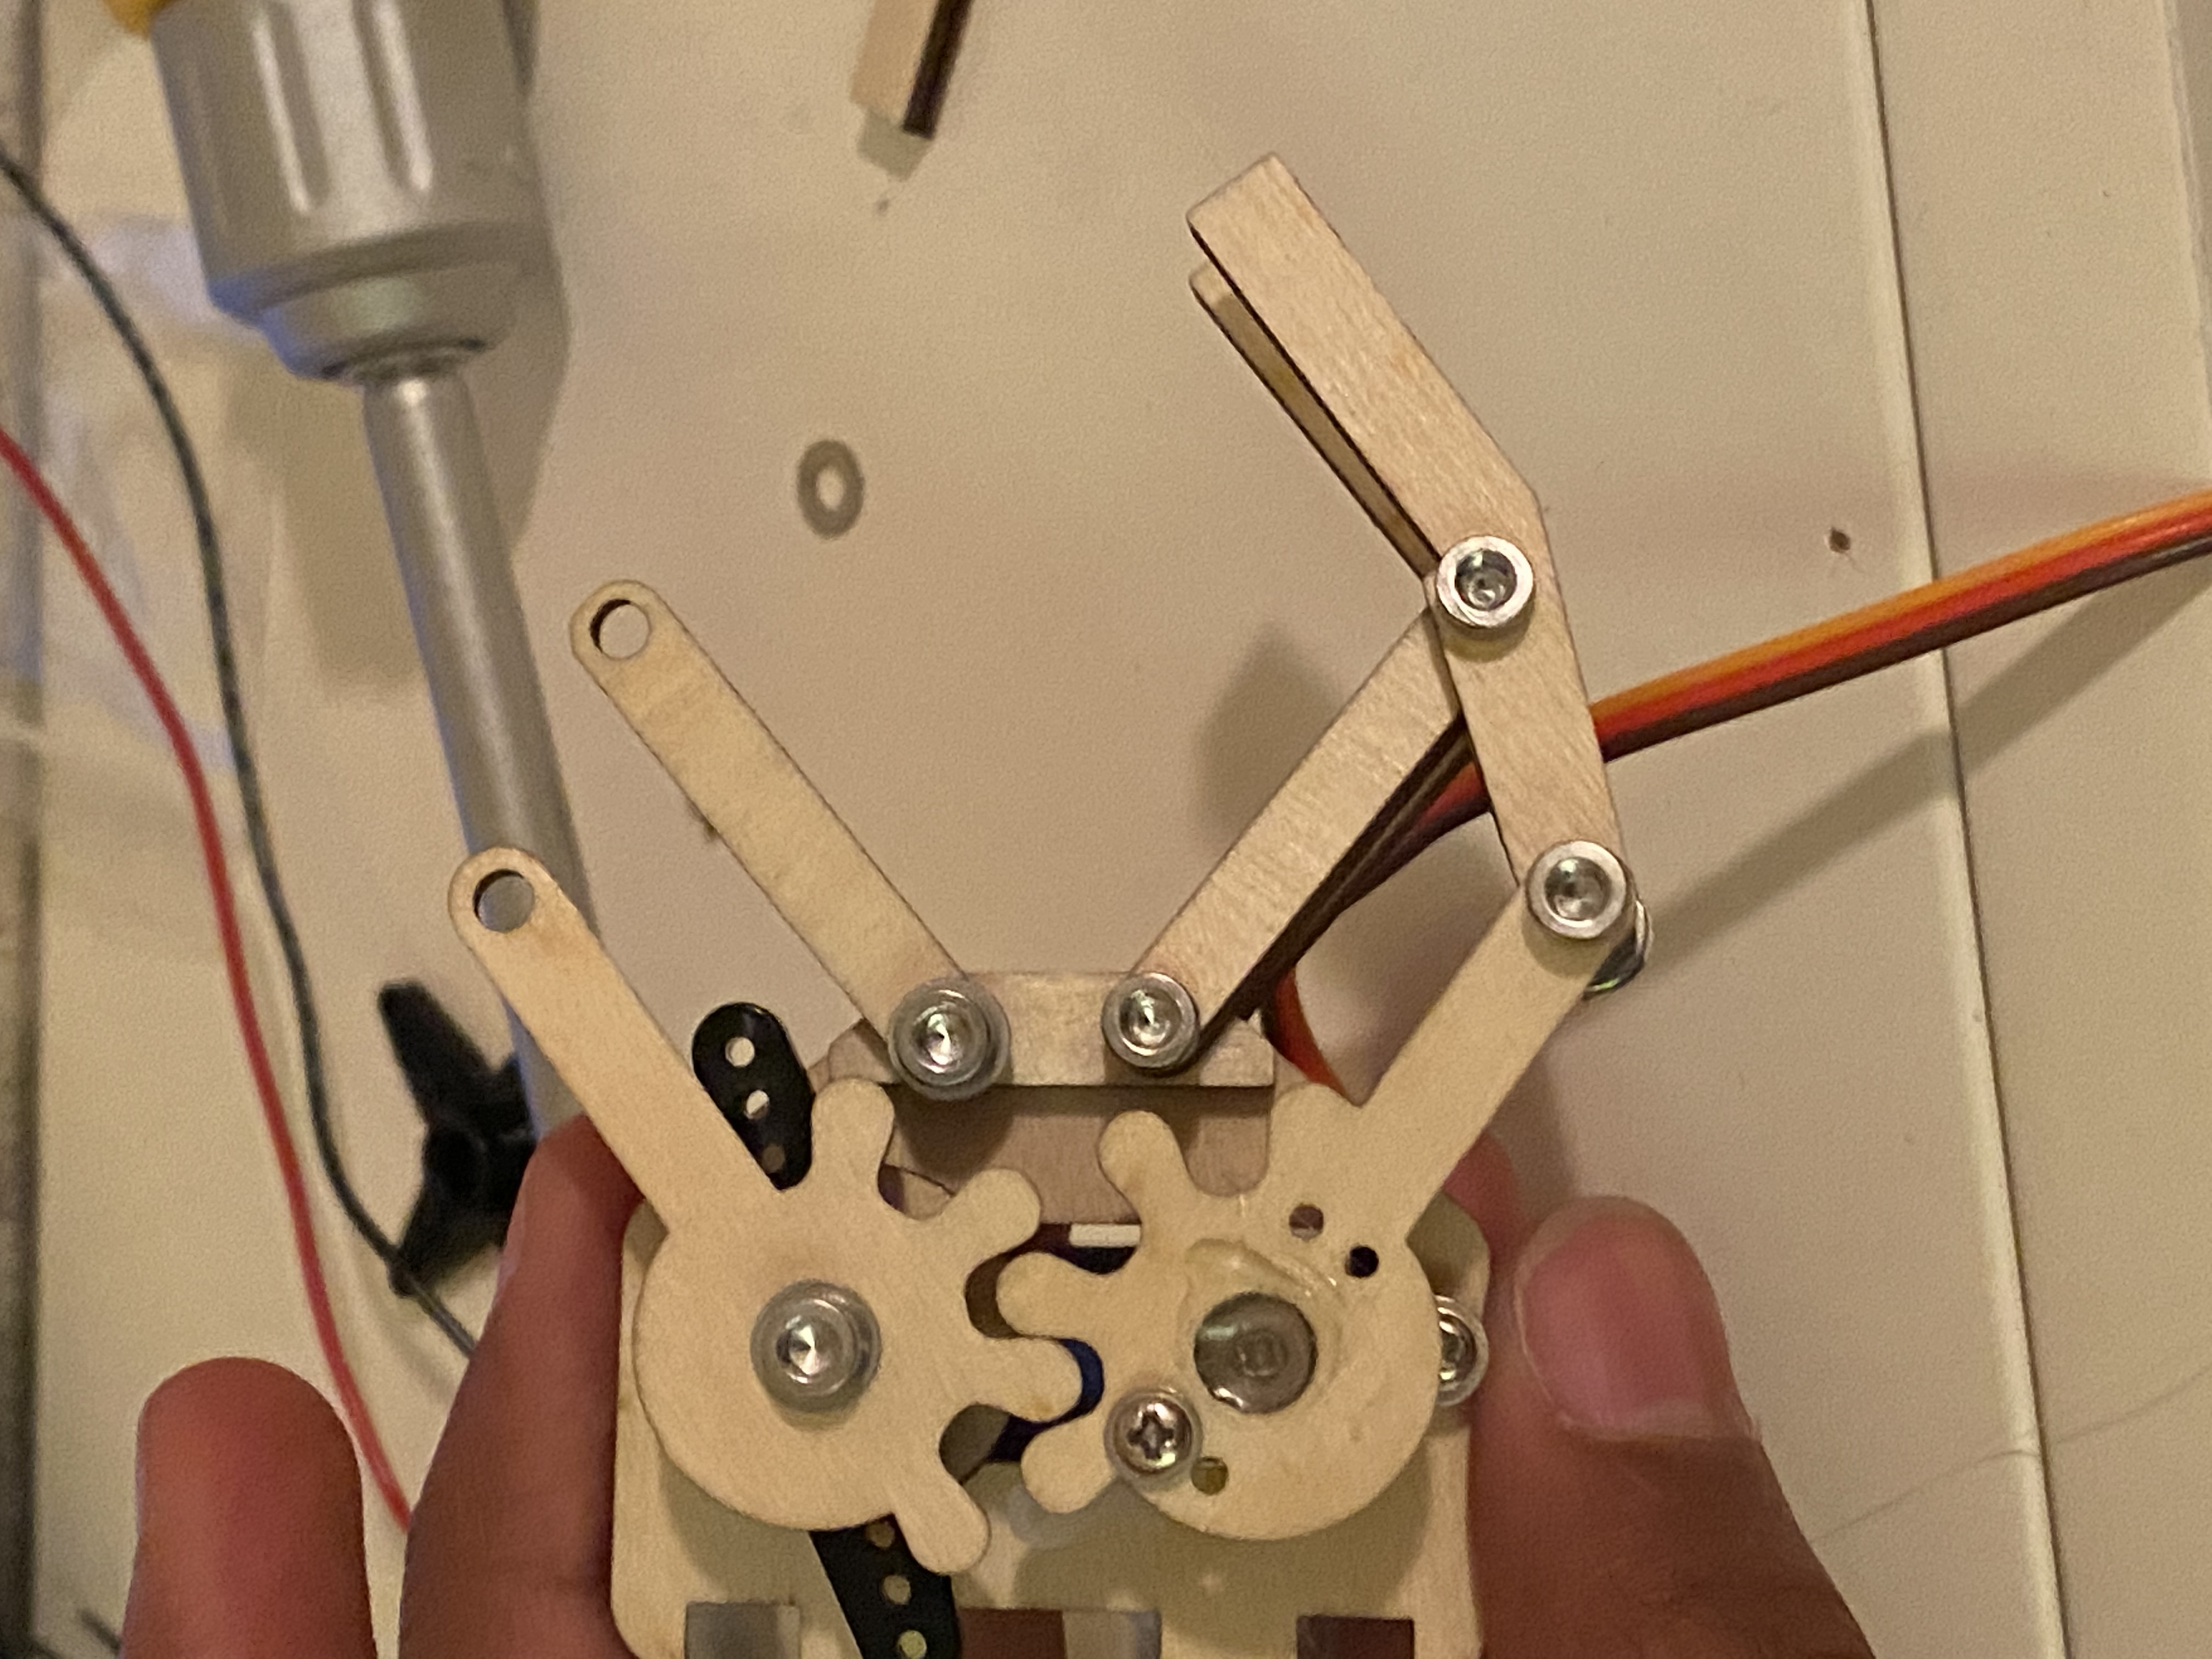
Here I start assembling the gripper. I modified this away from the original model to make the gripper wider in hopes it could pick up larger objects. This didn't fully work, but because of the servo model I used I couldn't do much about it anyways, since the servo cap was too tall to follow what was in the original CAD.
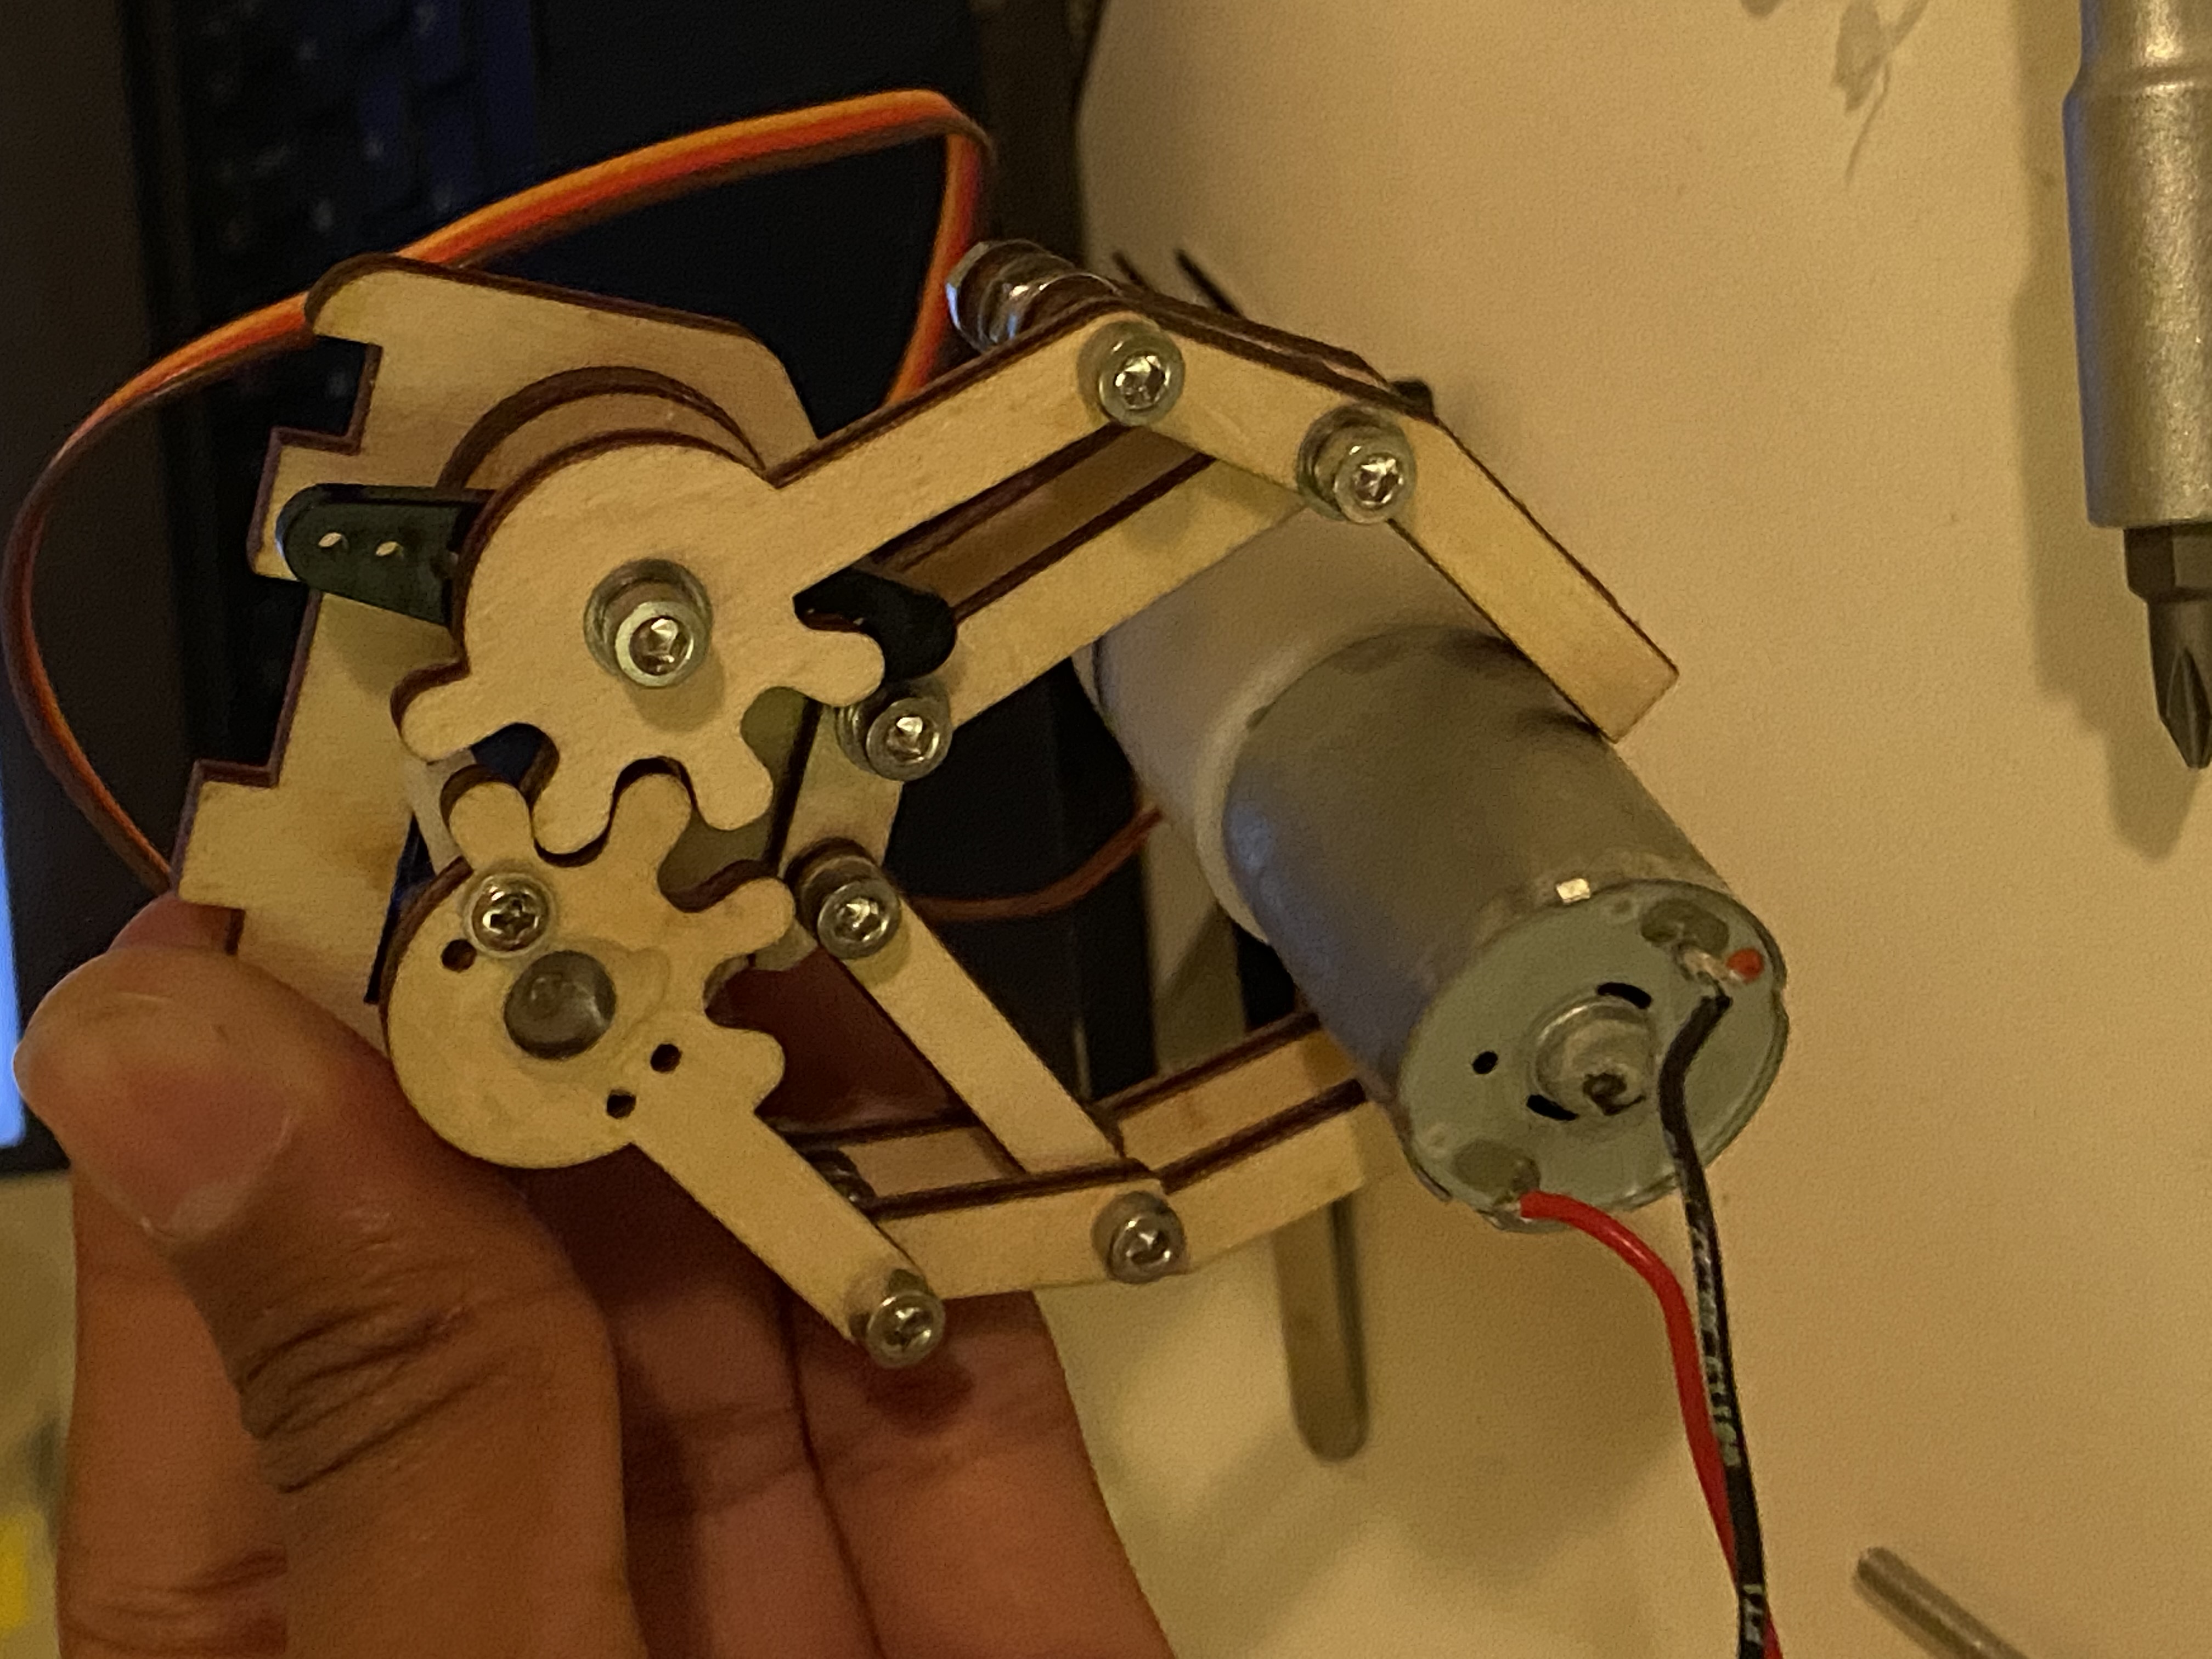
Completed gripper holding a DC motor. Unfortunately, the gripper only worked when it was assisted by gravity, and couldn't hold anything perpendicular to the ground unless there was a handle/string of some sort.
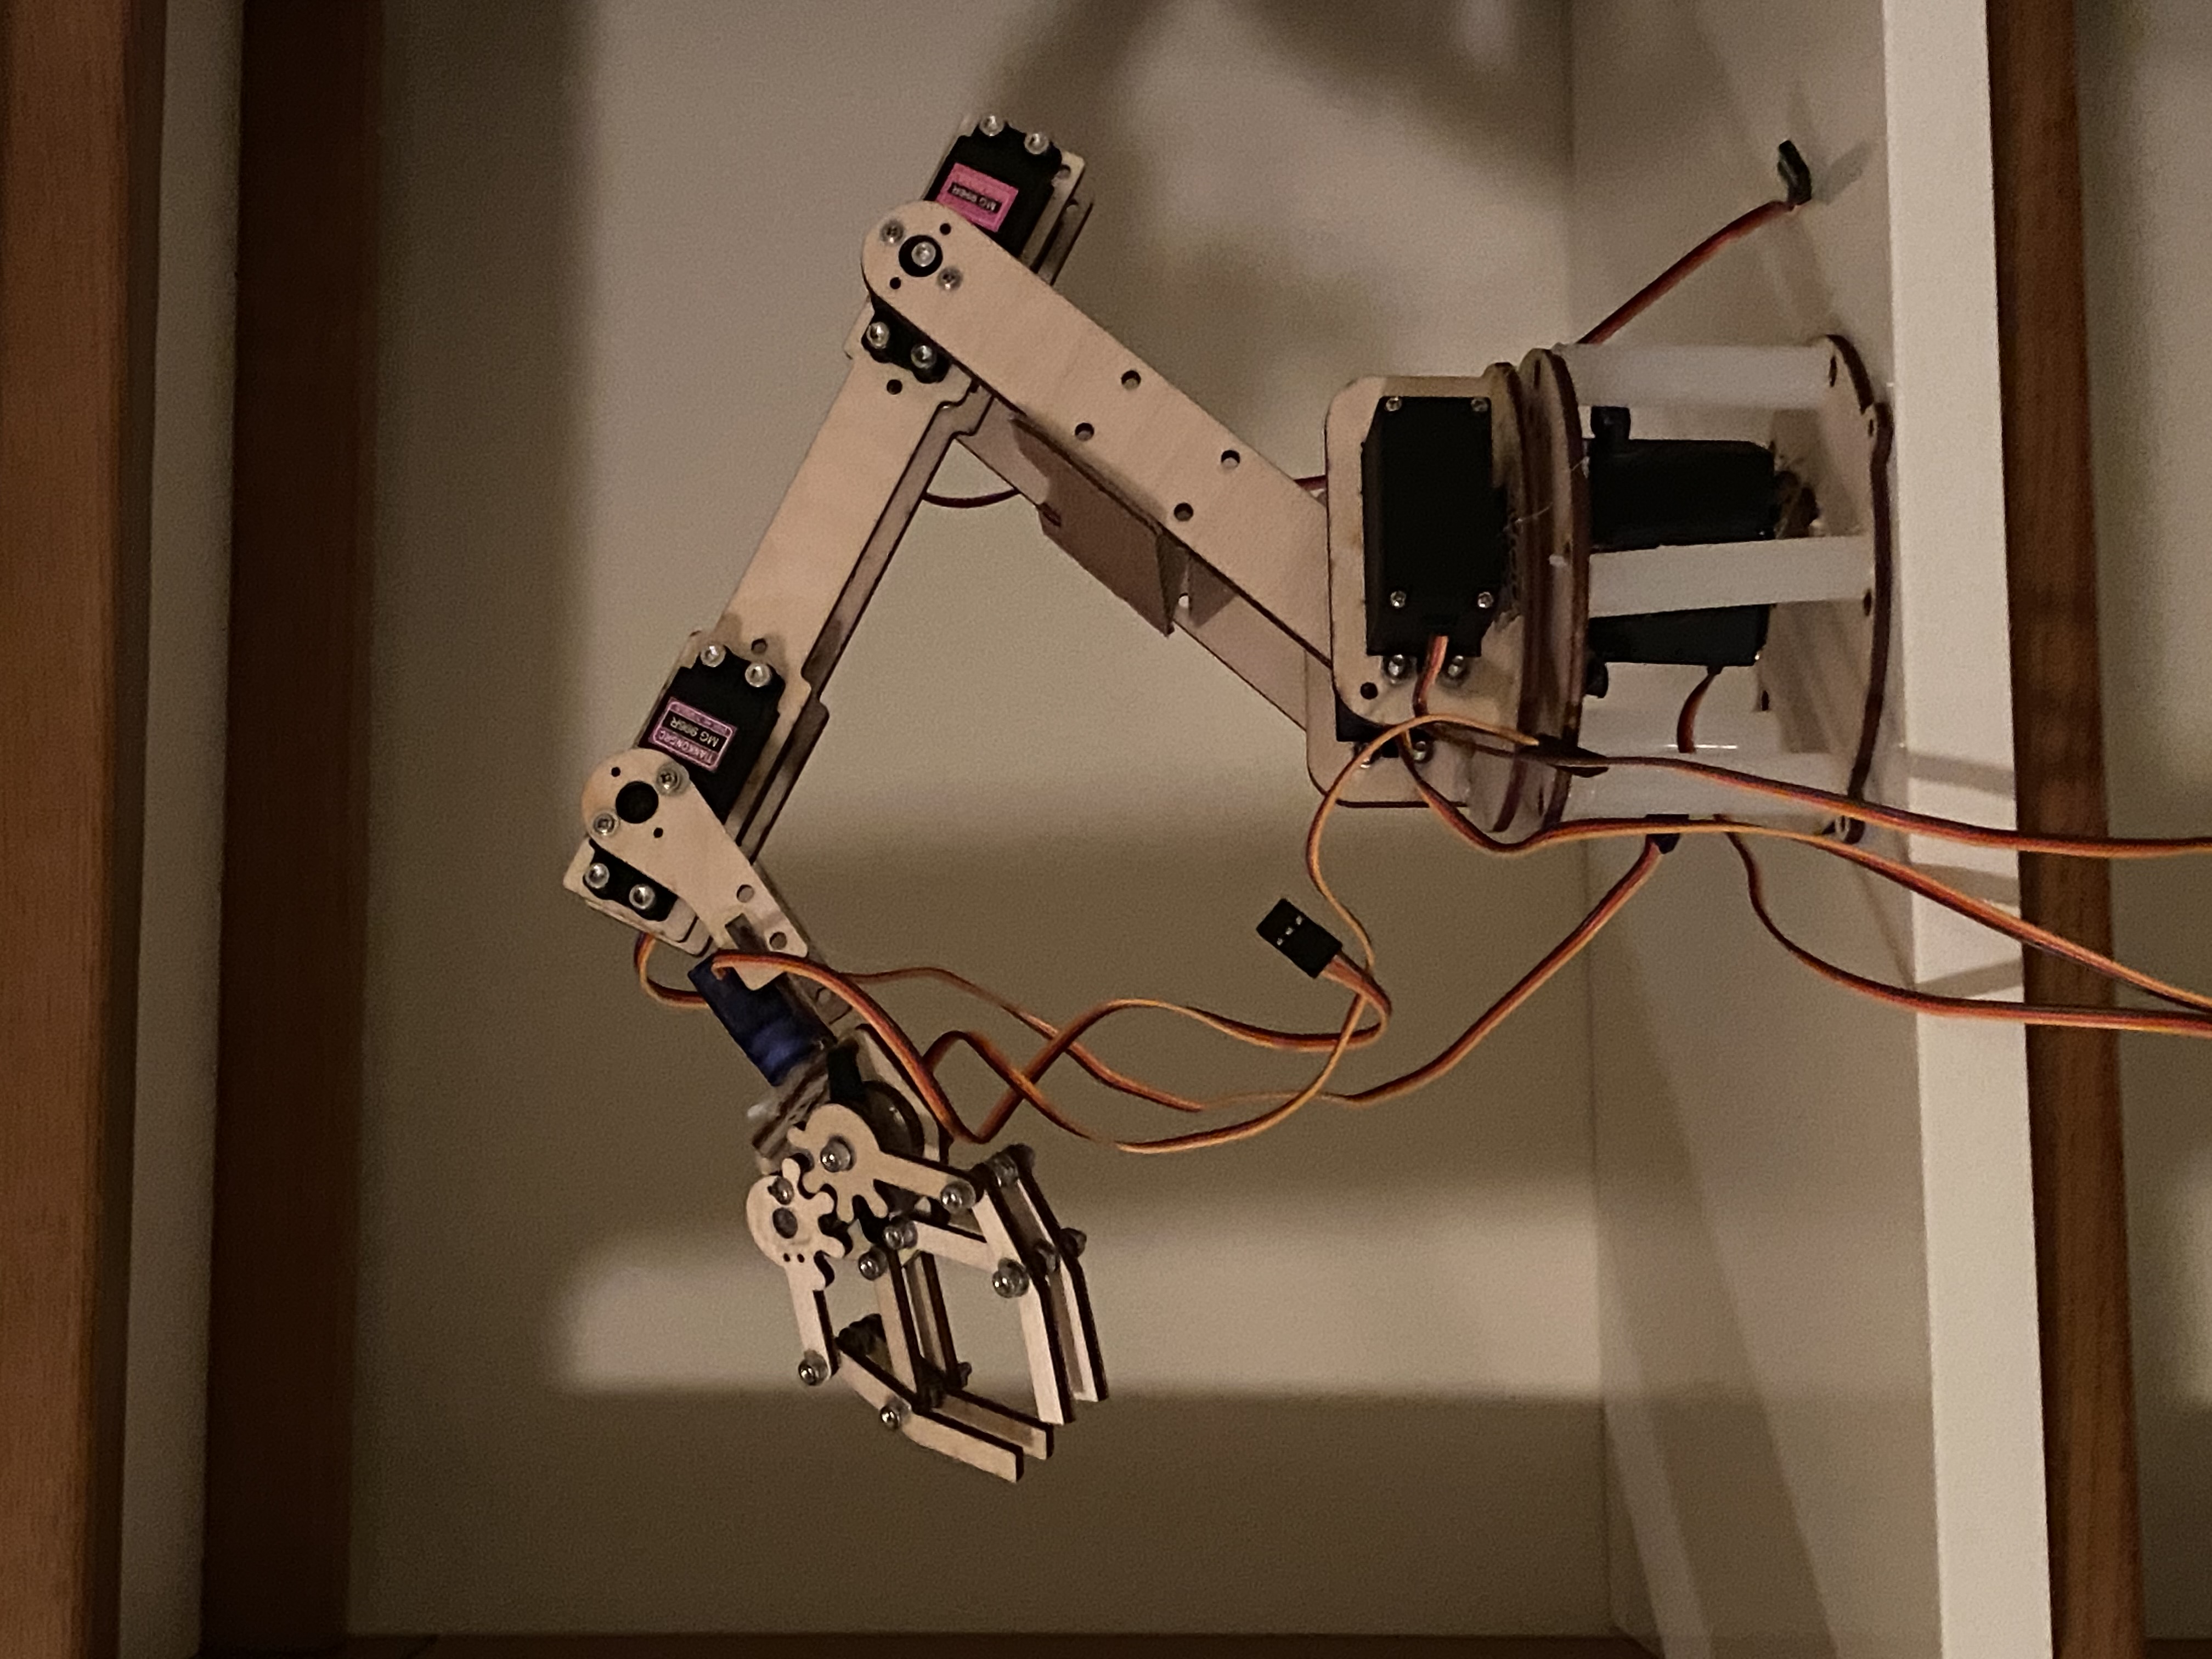
And, with that, the arm was done! I added in the "wrist", which I forgot to take a photo of. Basically, one regular servo motor controls the pivot of the wrist (up and down), and attached to that is a mini-servo controlling the rotation of the forearm.
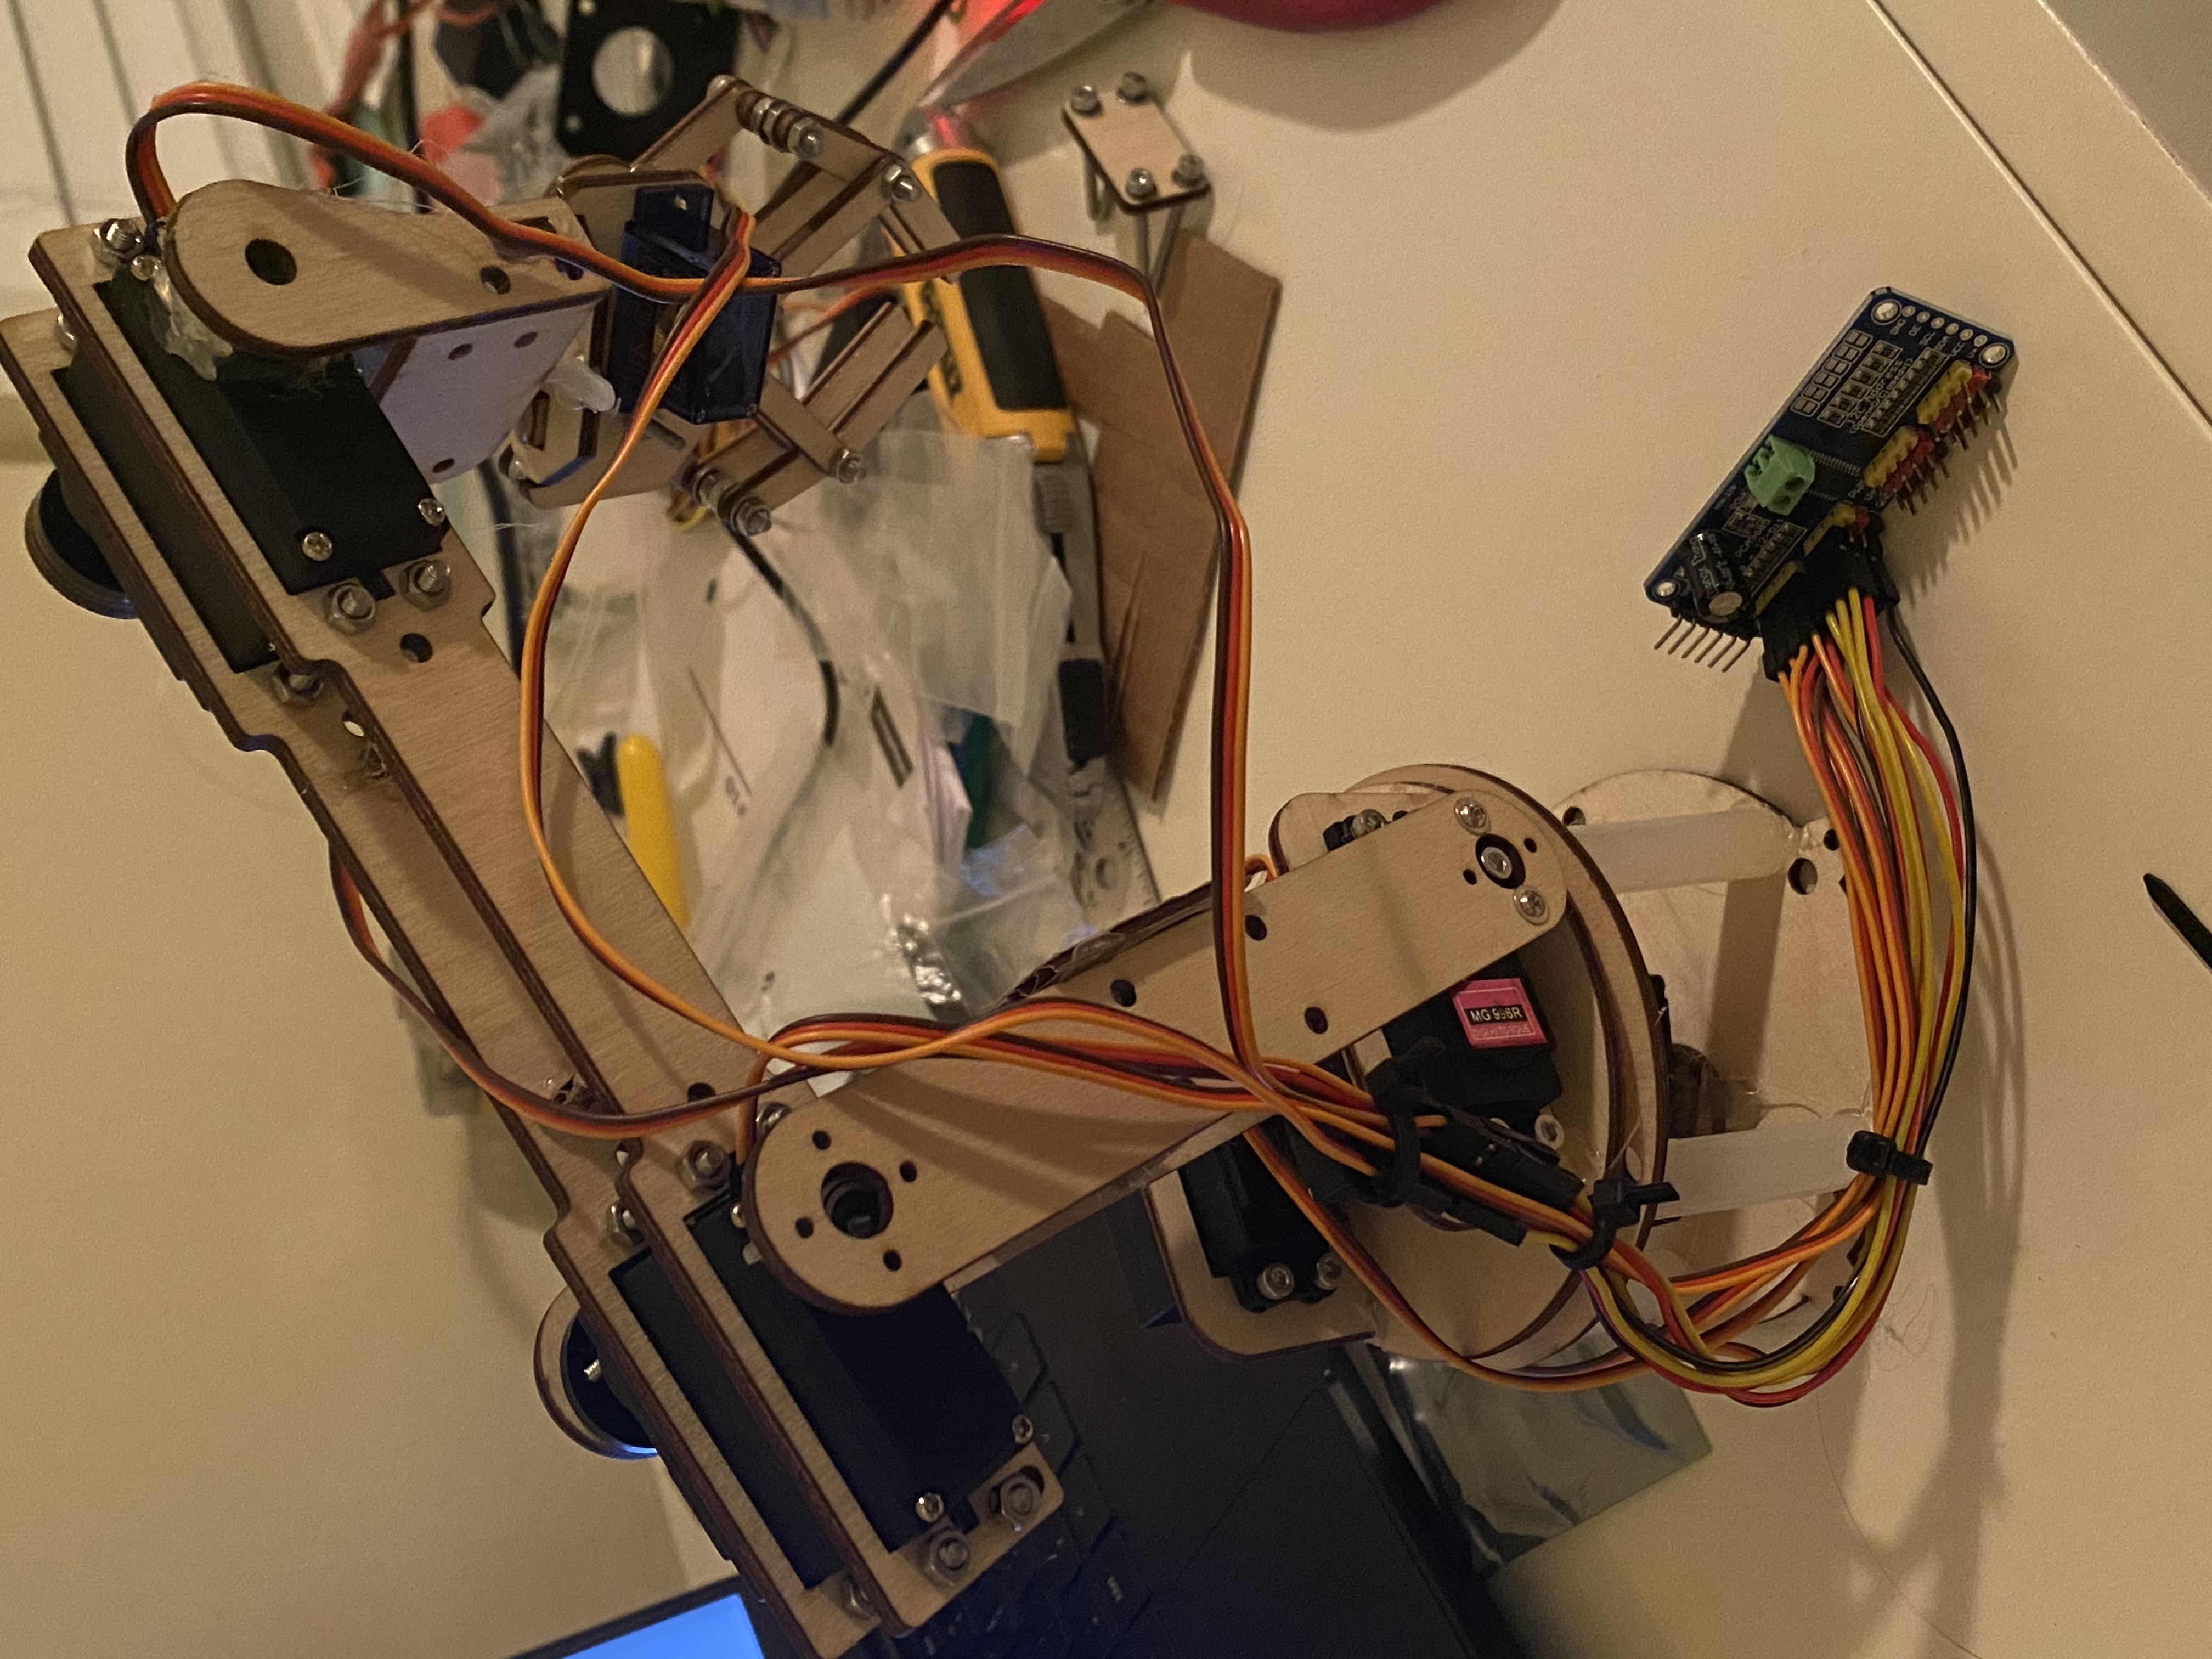
I plugged in all of the servo wires to the servo controller via jumper wires.
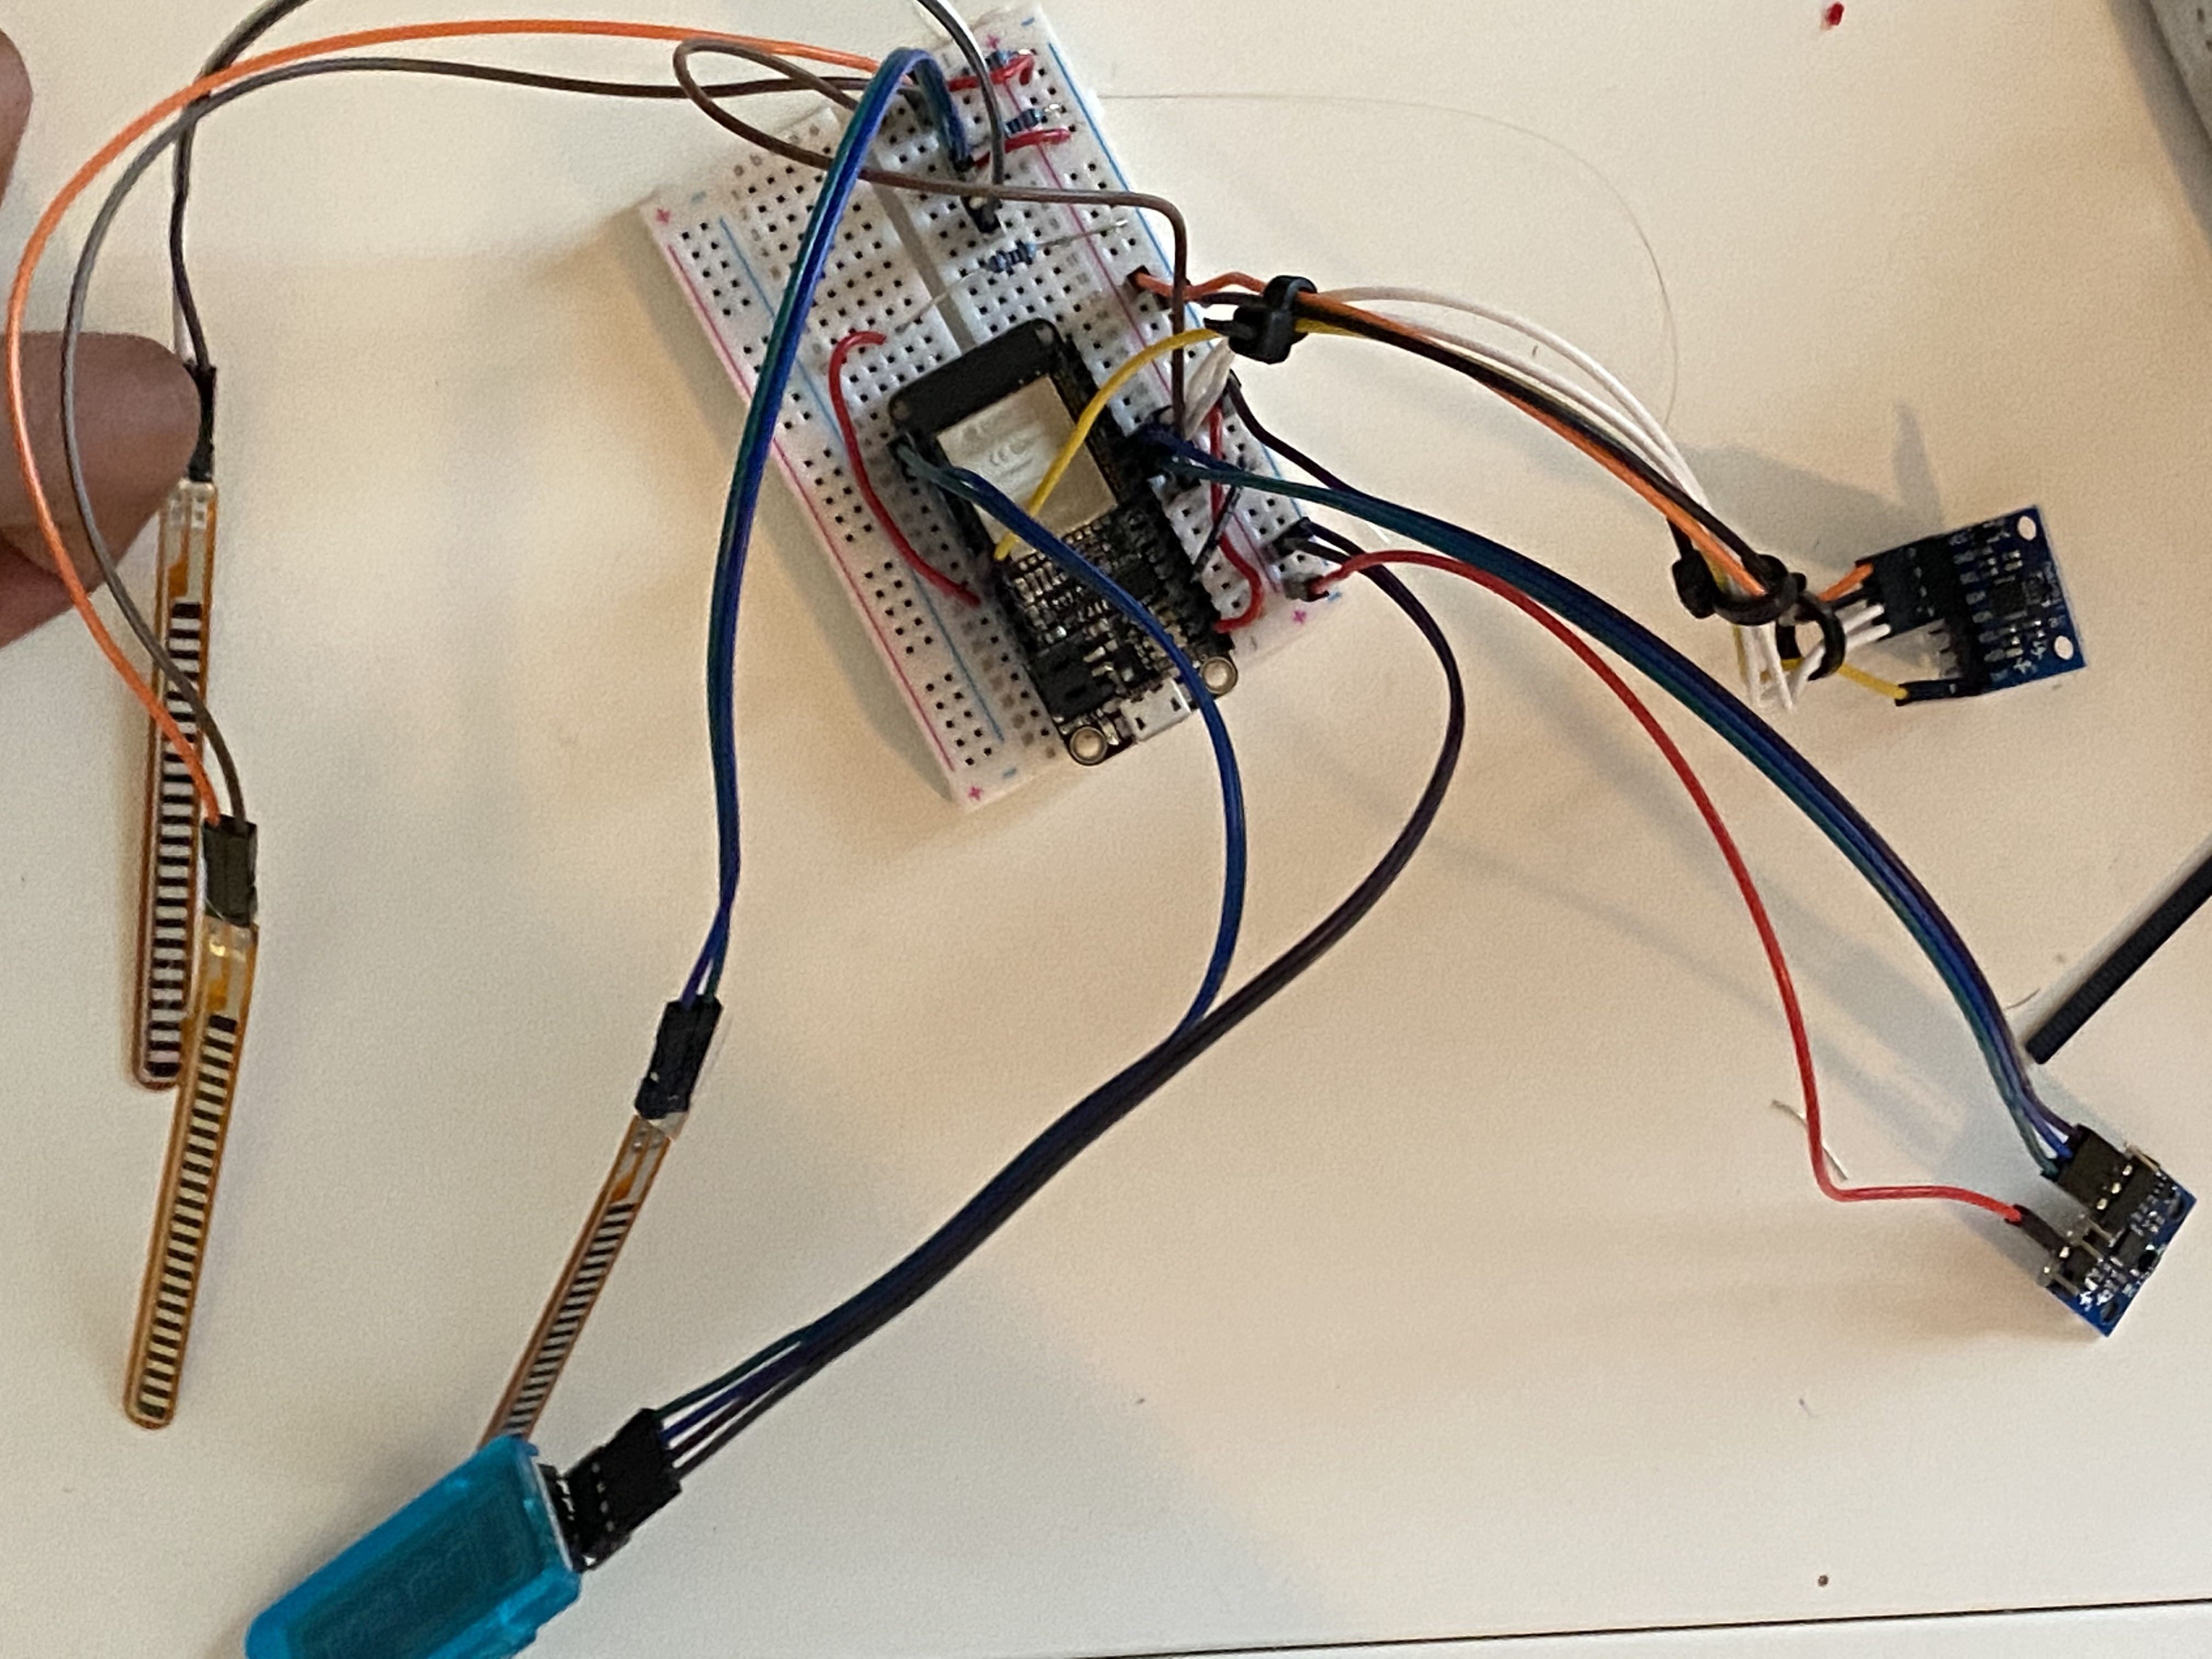
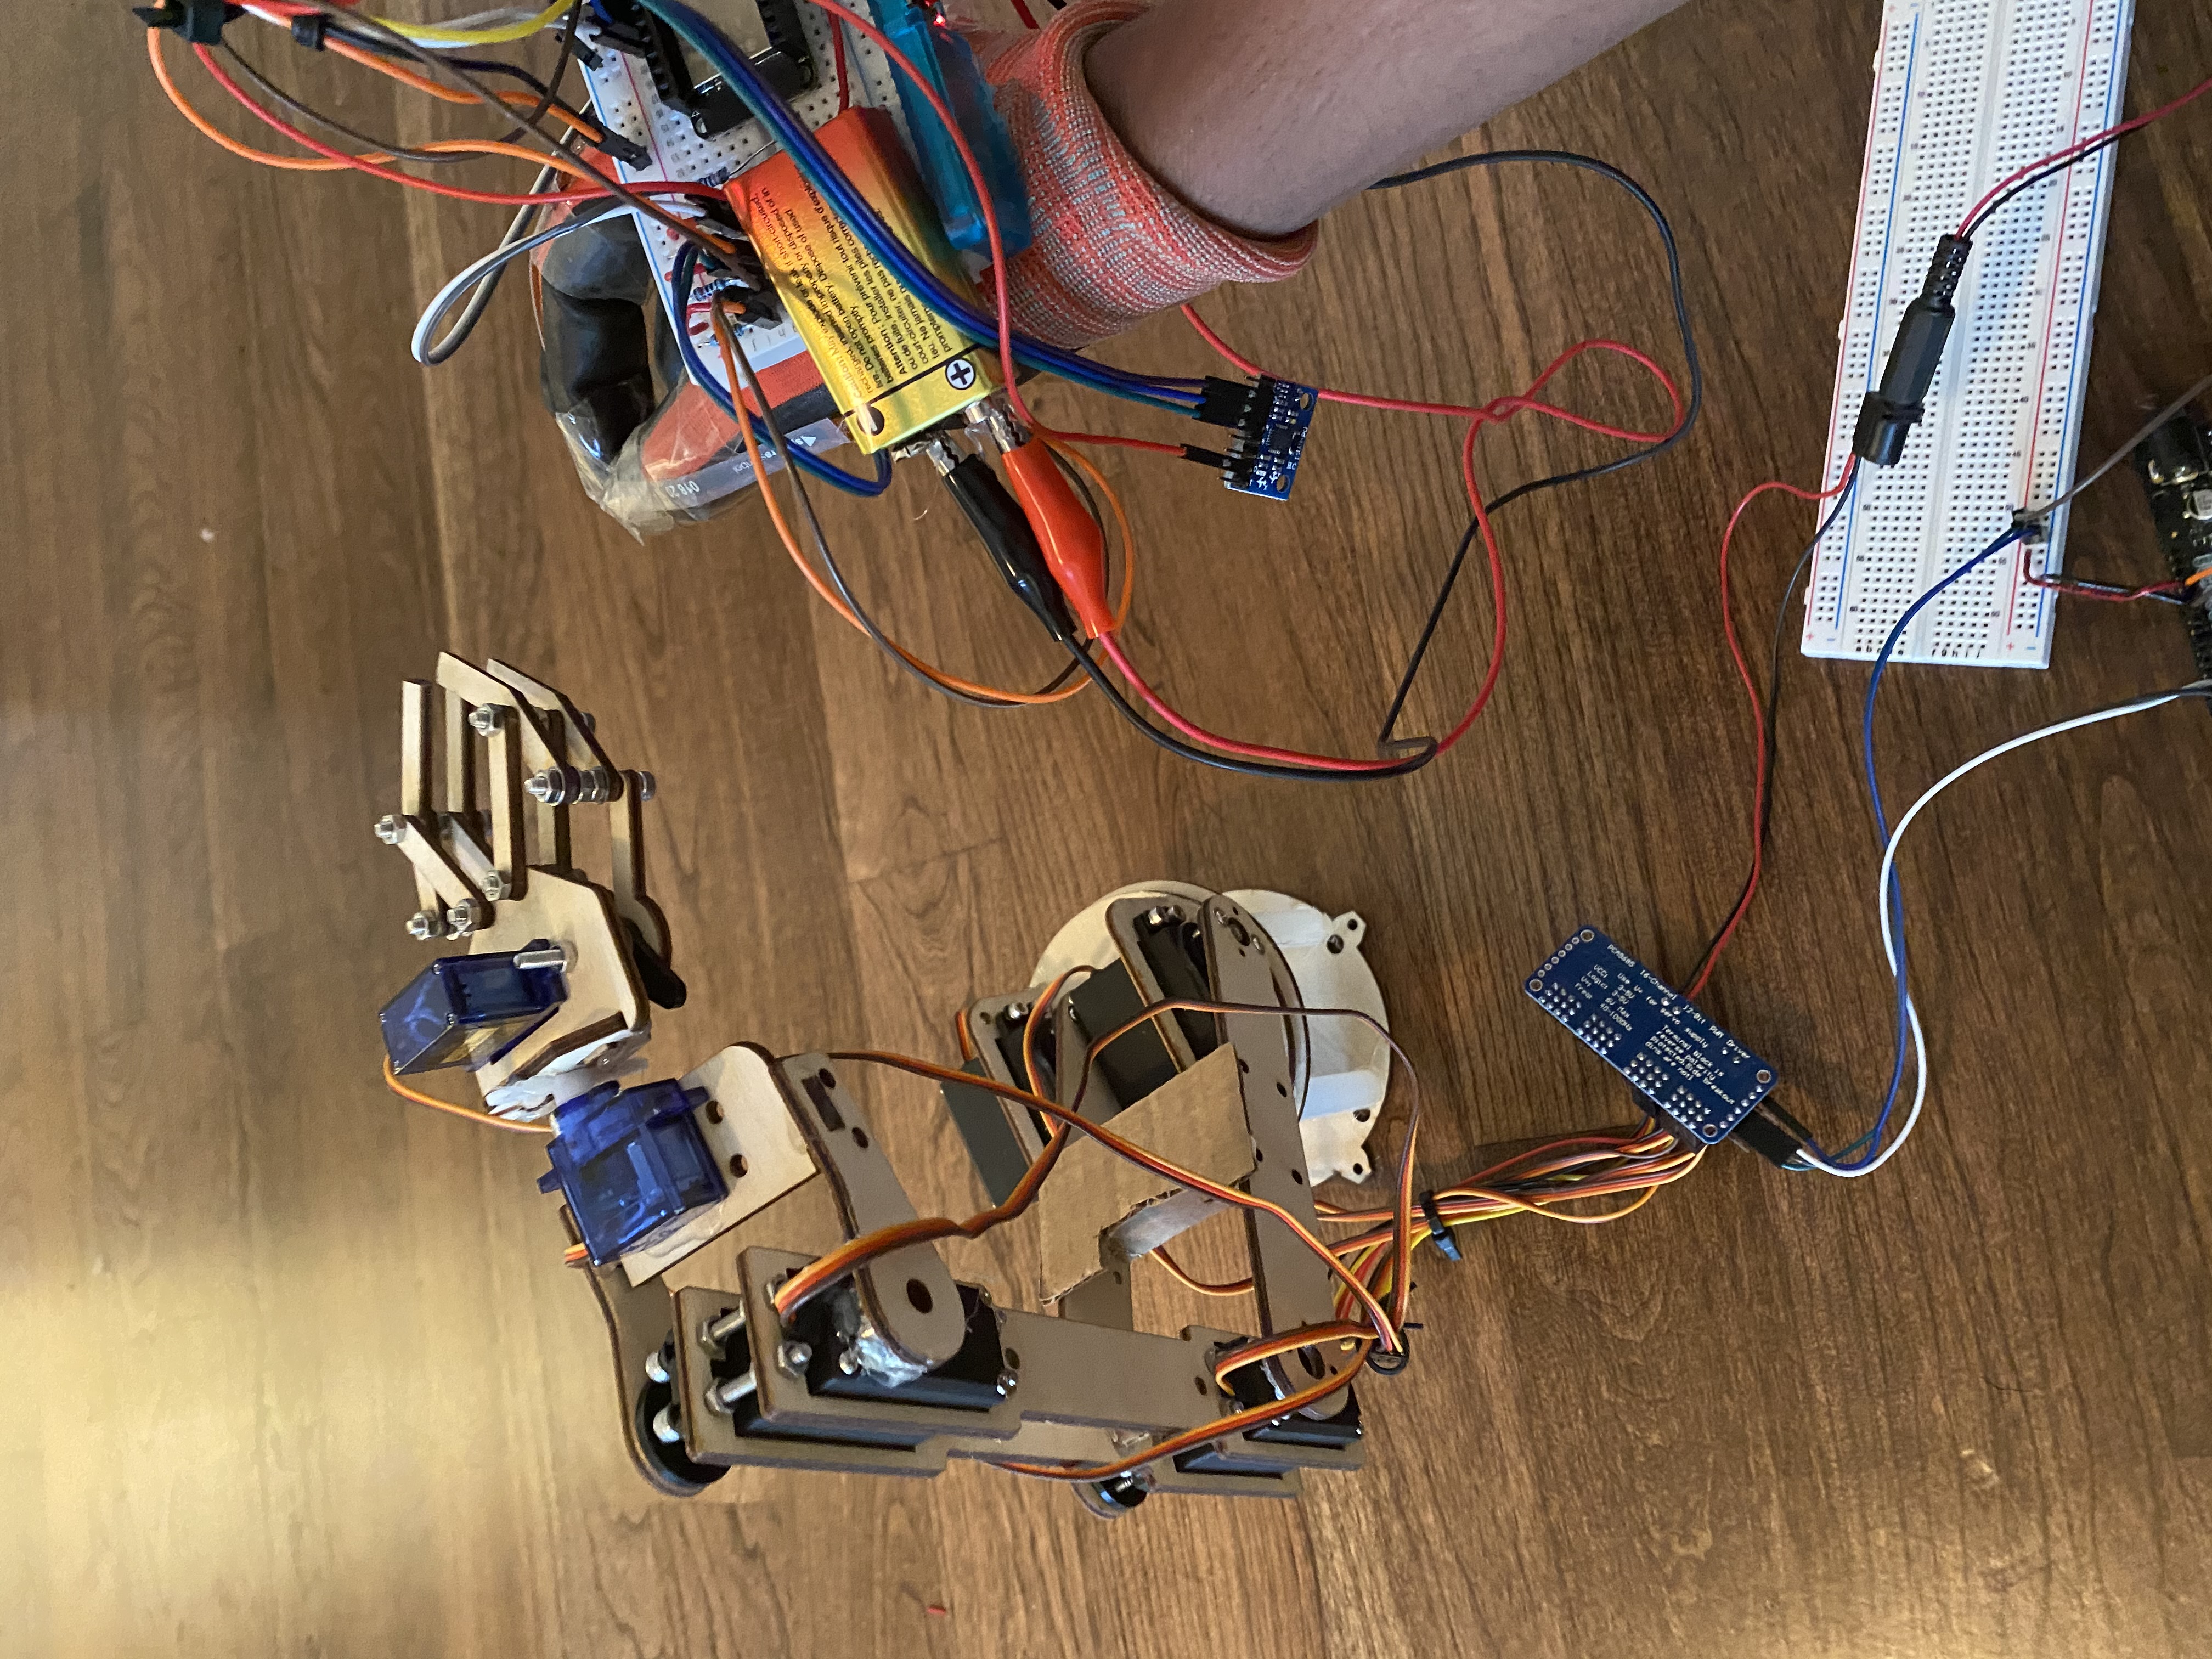
Here you can see me beginning to assemble the glove. You can see preliminary electronics and all of the parts used (flex sensors, HC-05, accelerometer, etc.
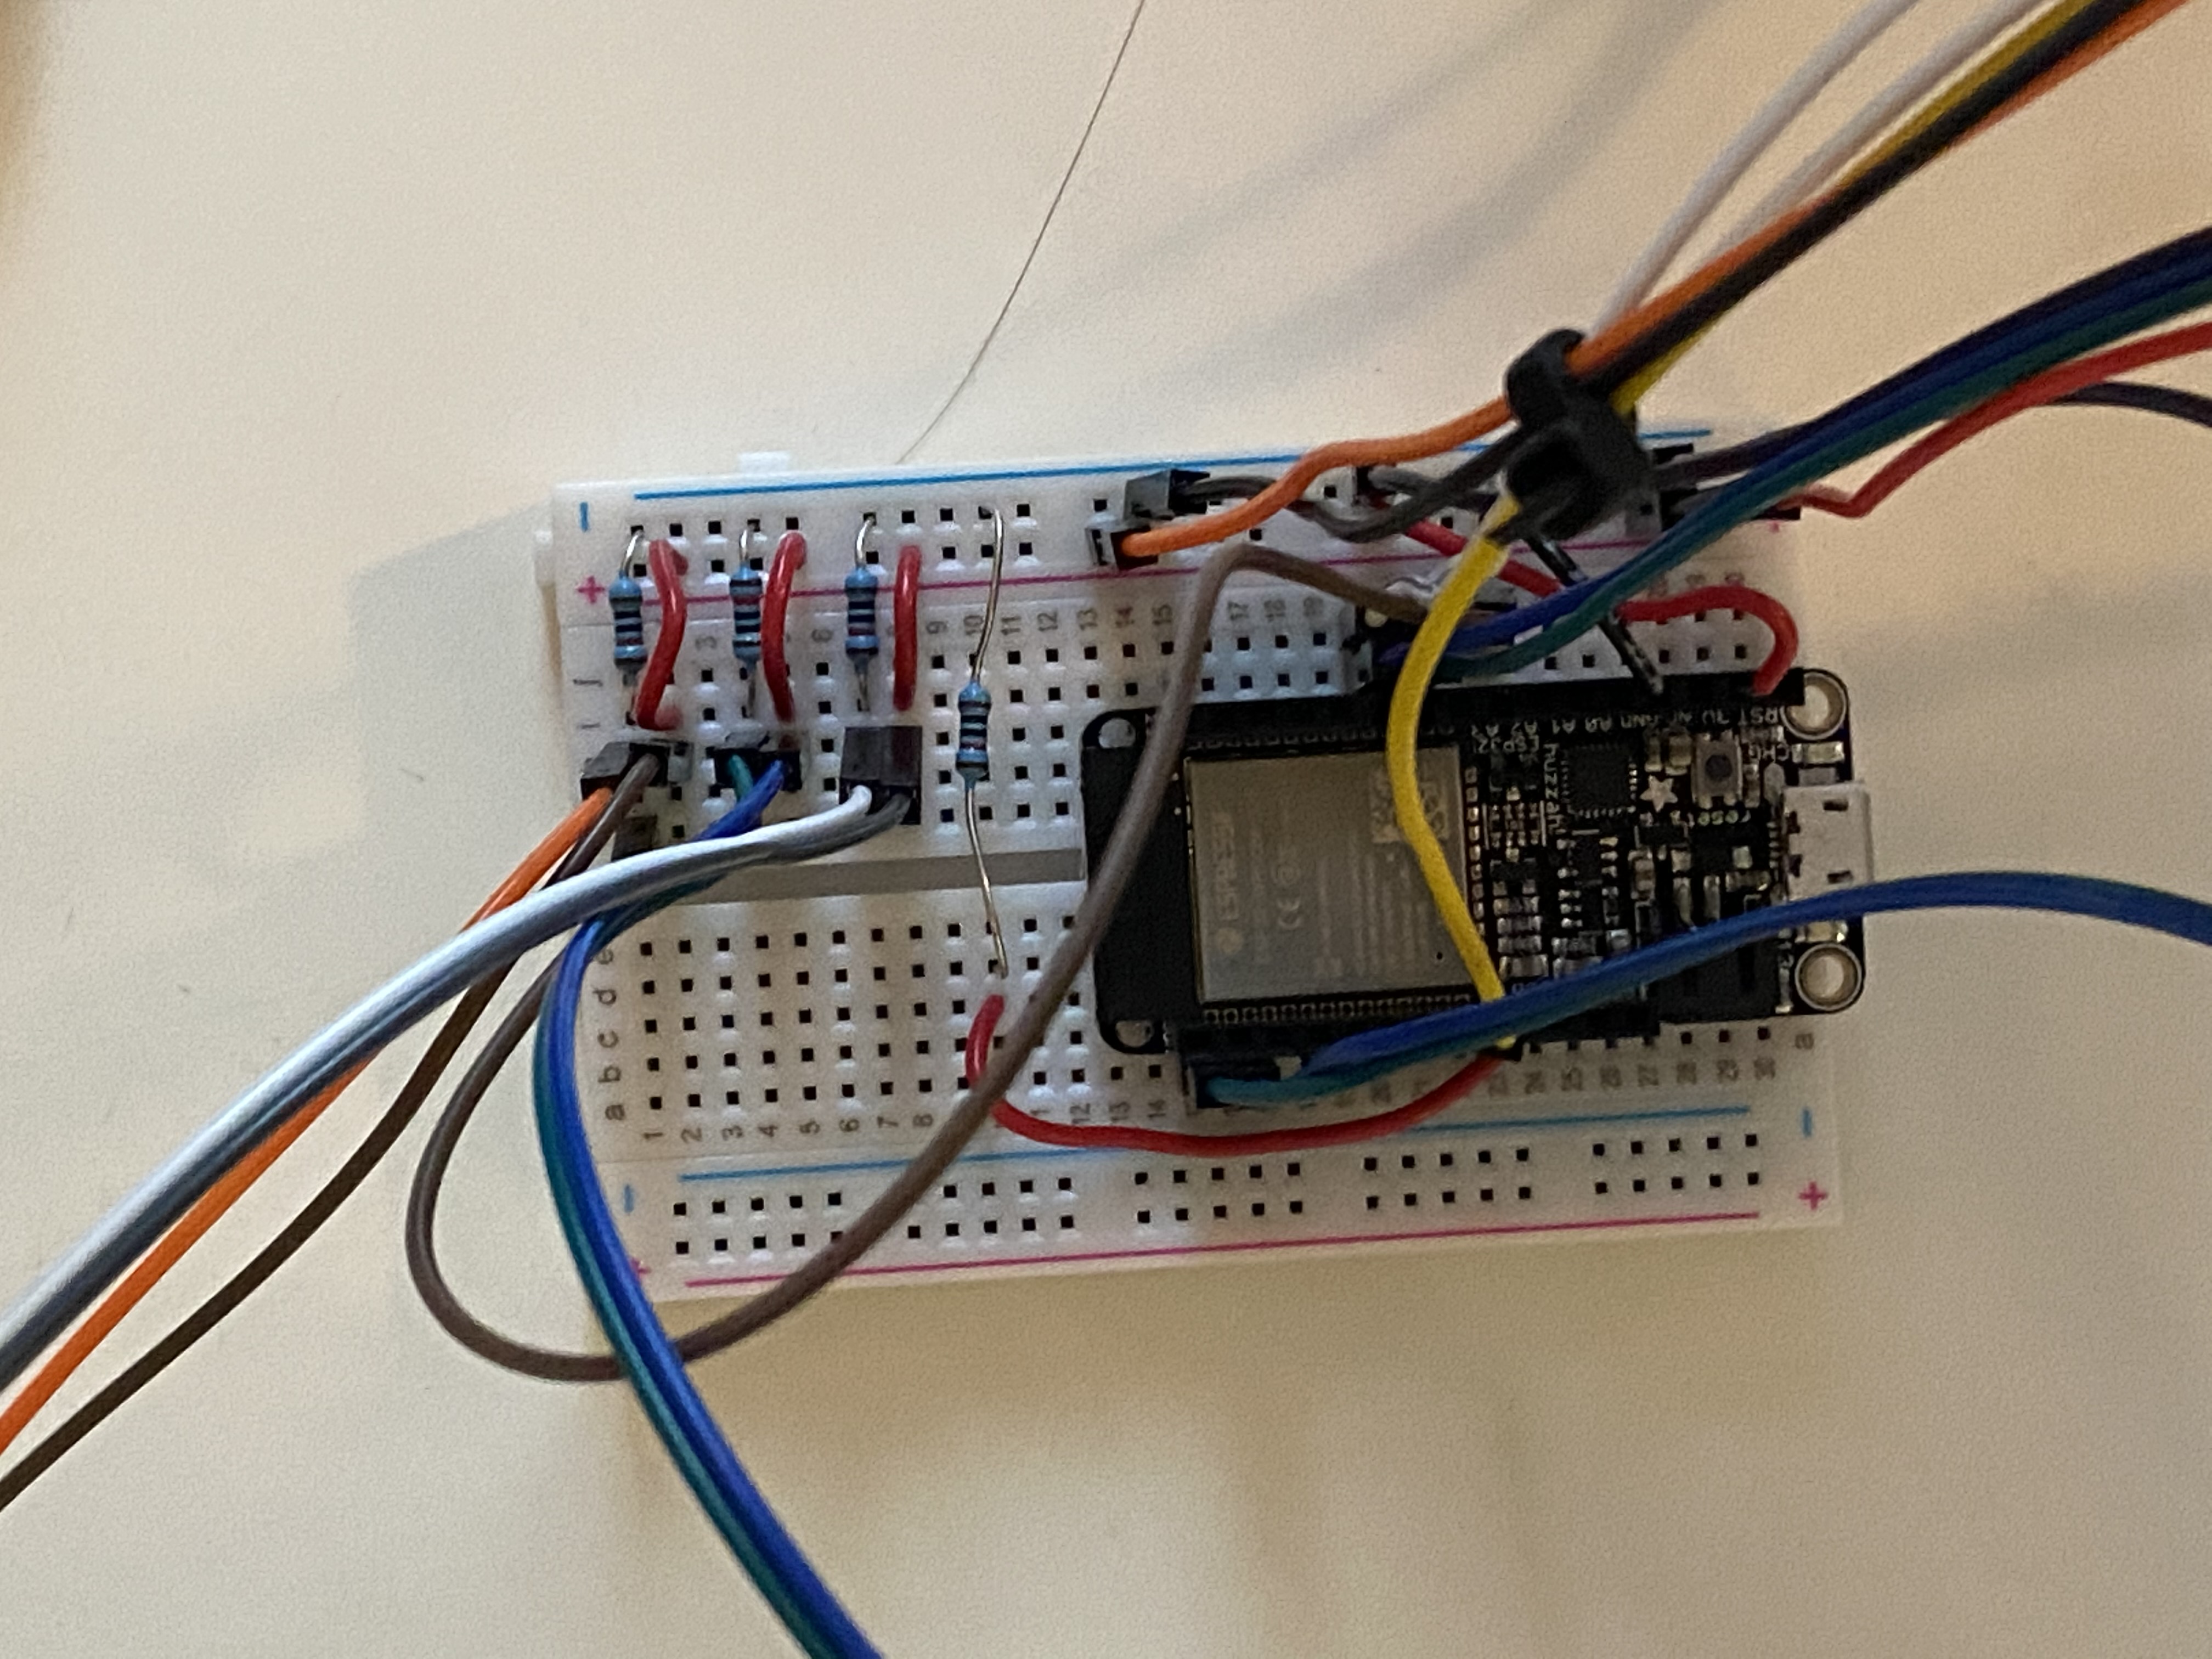
Here's a close-up of the wiring I used. Later on this became undone and I accidentally plugged the HC-05 into another slot, which led to a problem that took me hours to solve. So, don't do that. This wiring is all sensors, so everything is plugged into analog pins.
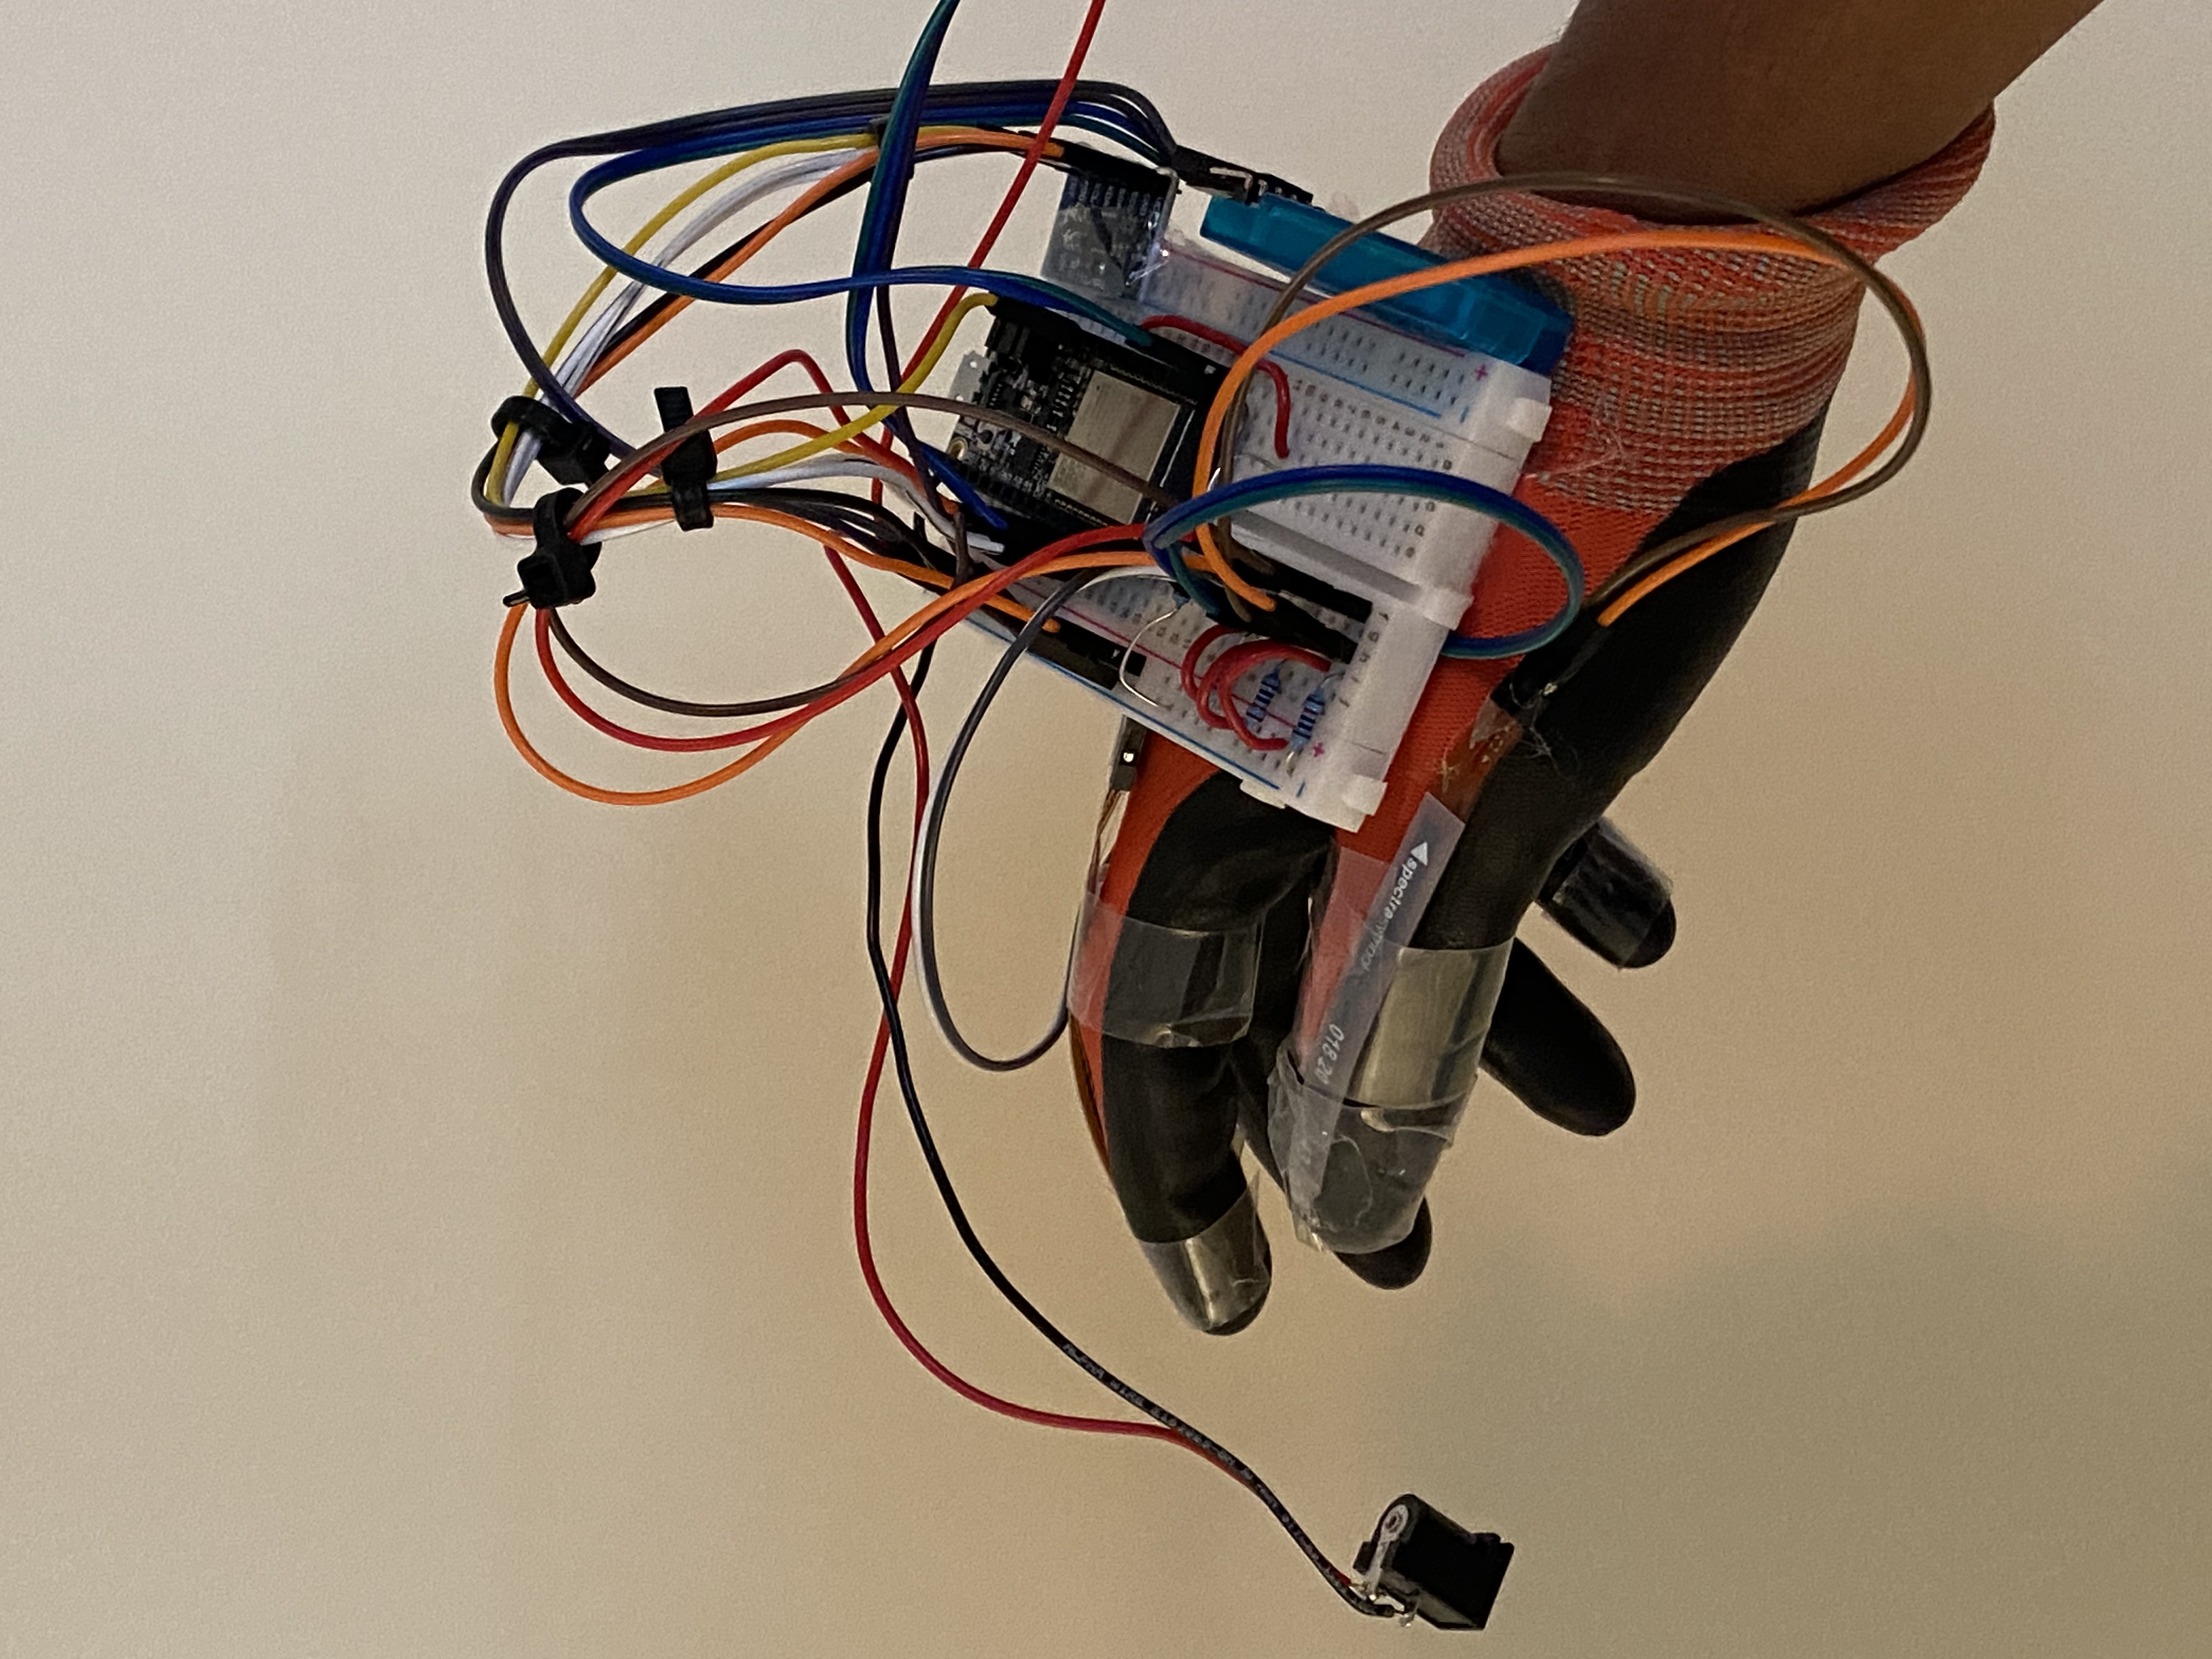
Here's the first iteration of the glove. However, at this point the power and ground are being powered by the wire in the kit converting 9V power to wires for a breadboard.
I replace that wire and use that for the servo driver, and instead hot glued a 9V battery to the glove and connected it with clip wires.
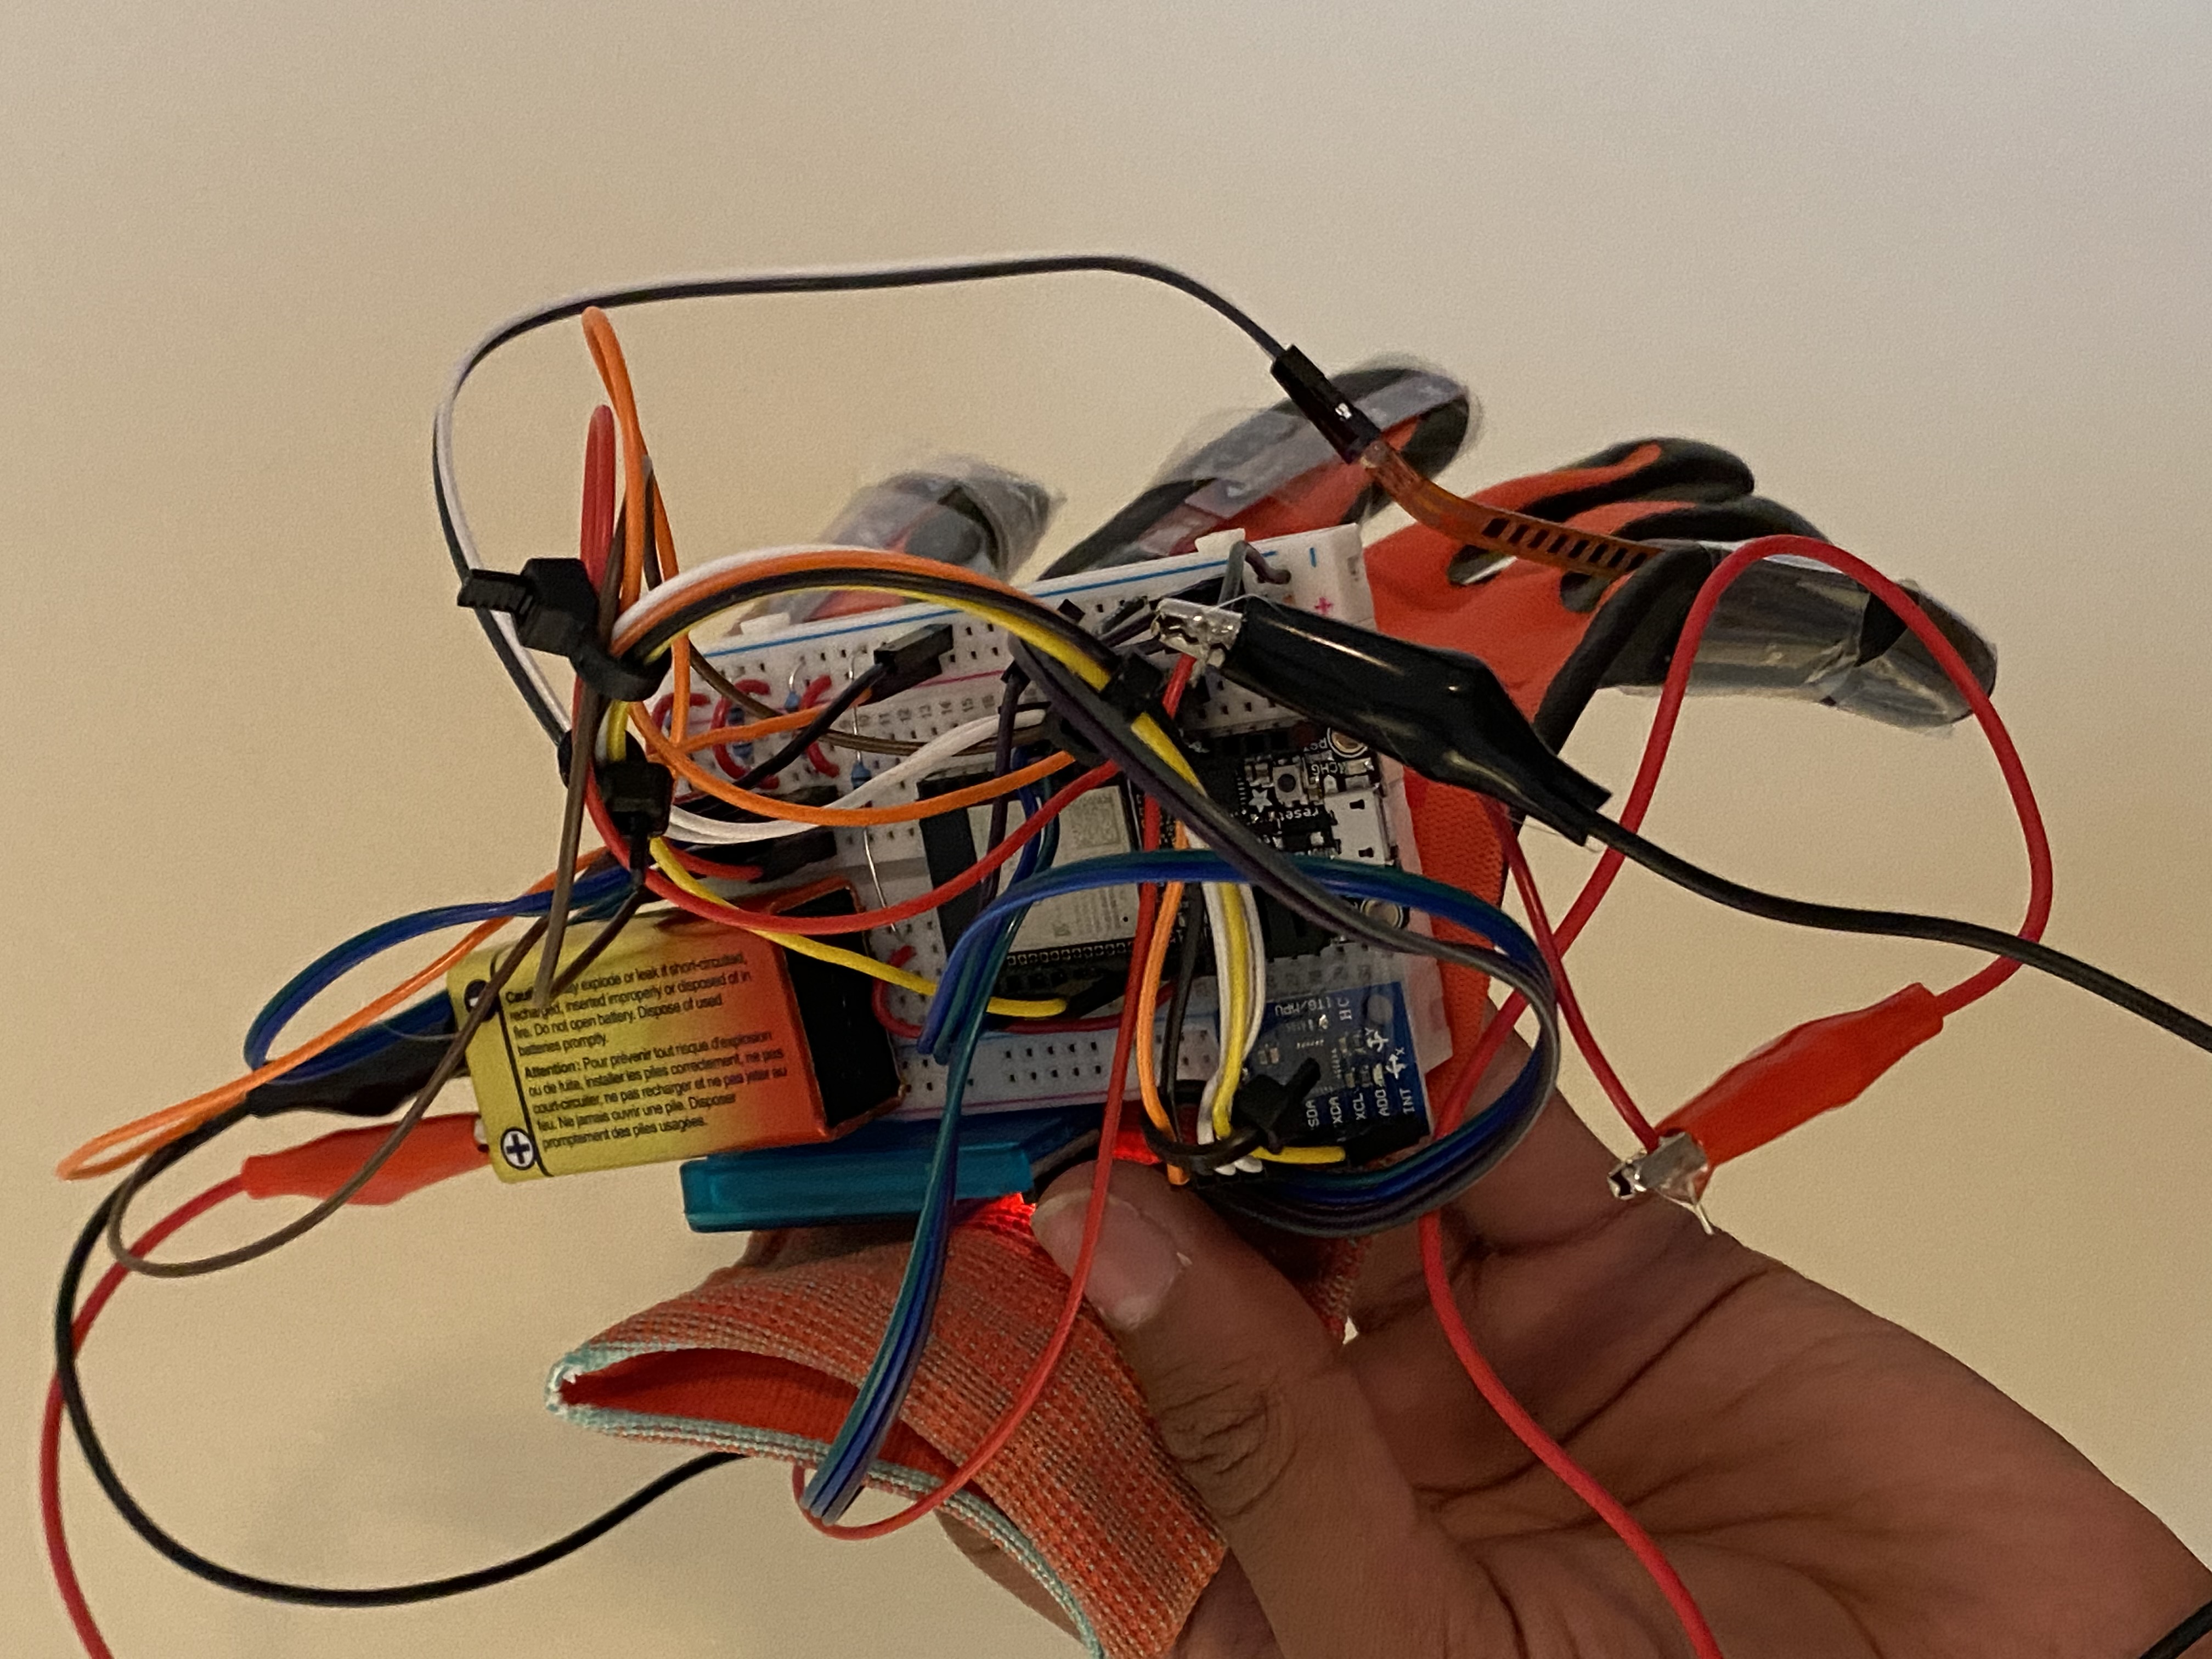
I added the hc-05 to the arm, and now the electronics are set.
robotic arm online, receiving it's first line of code! very exciting moment, so i put it here.
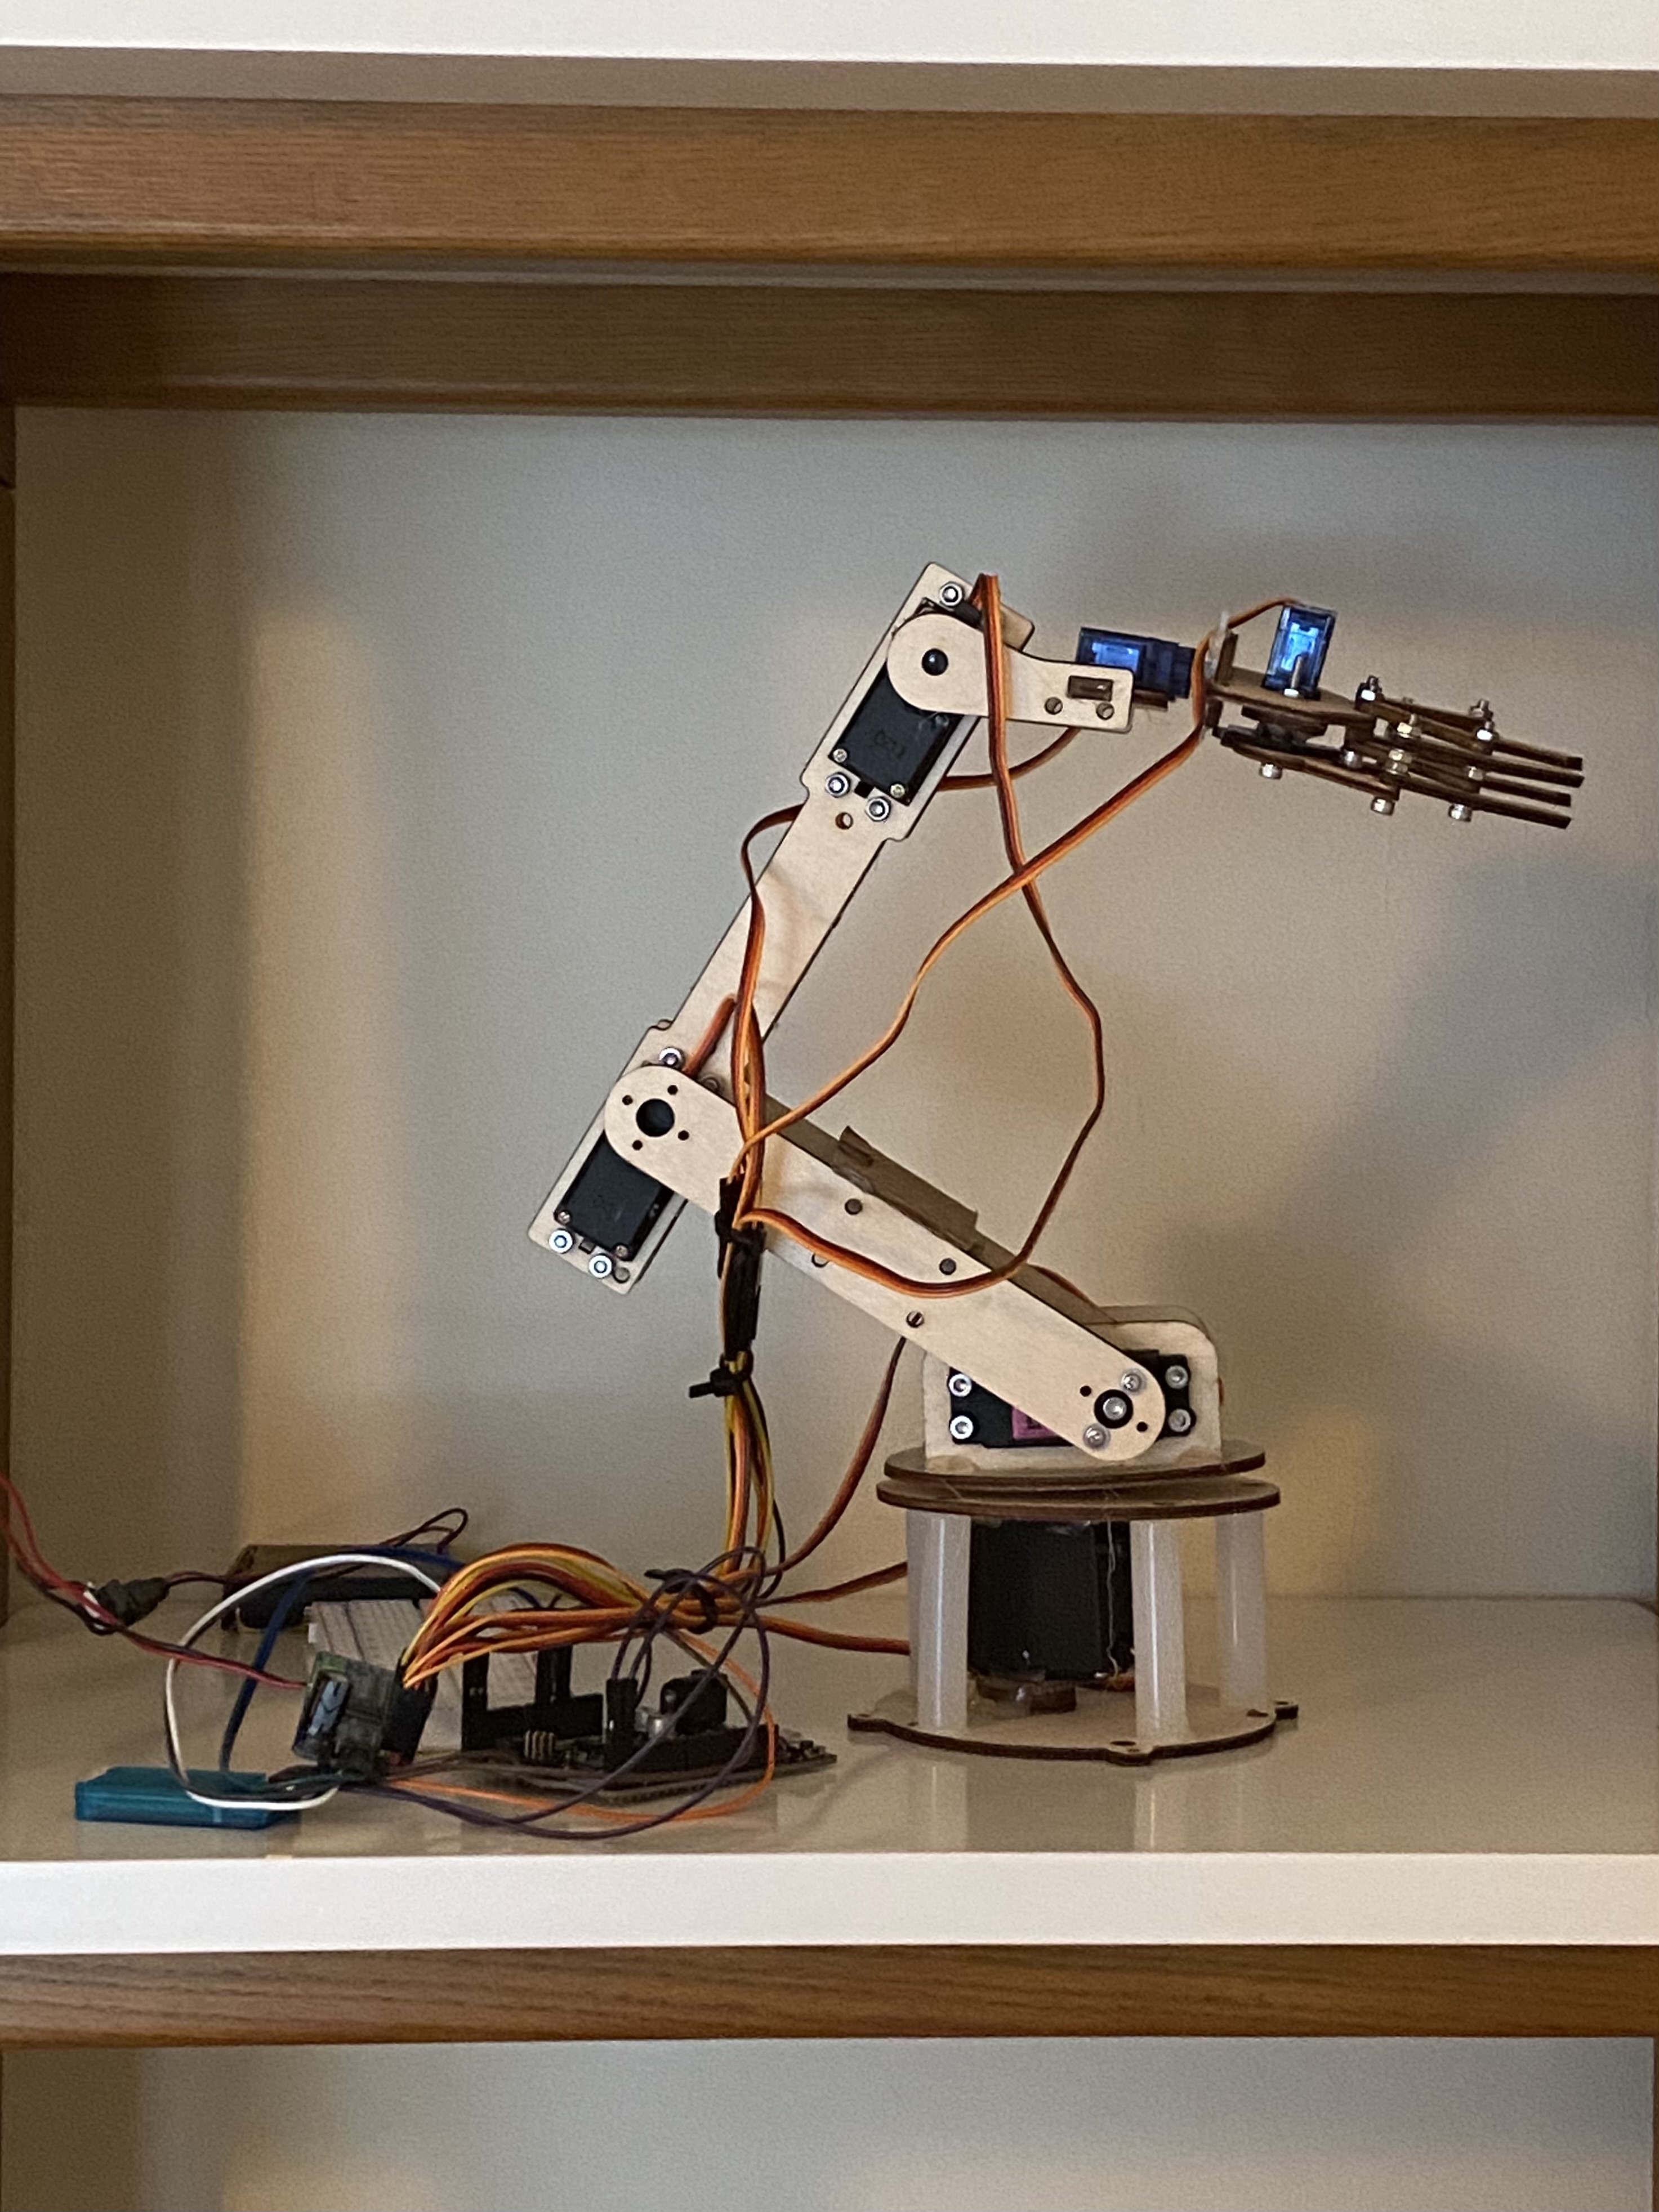
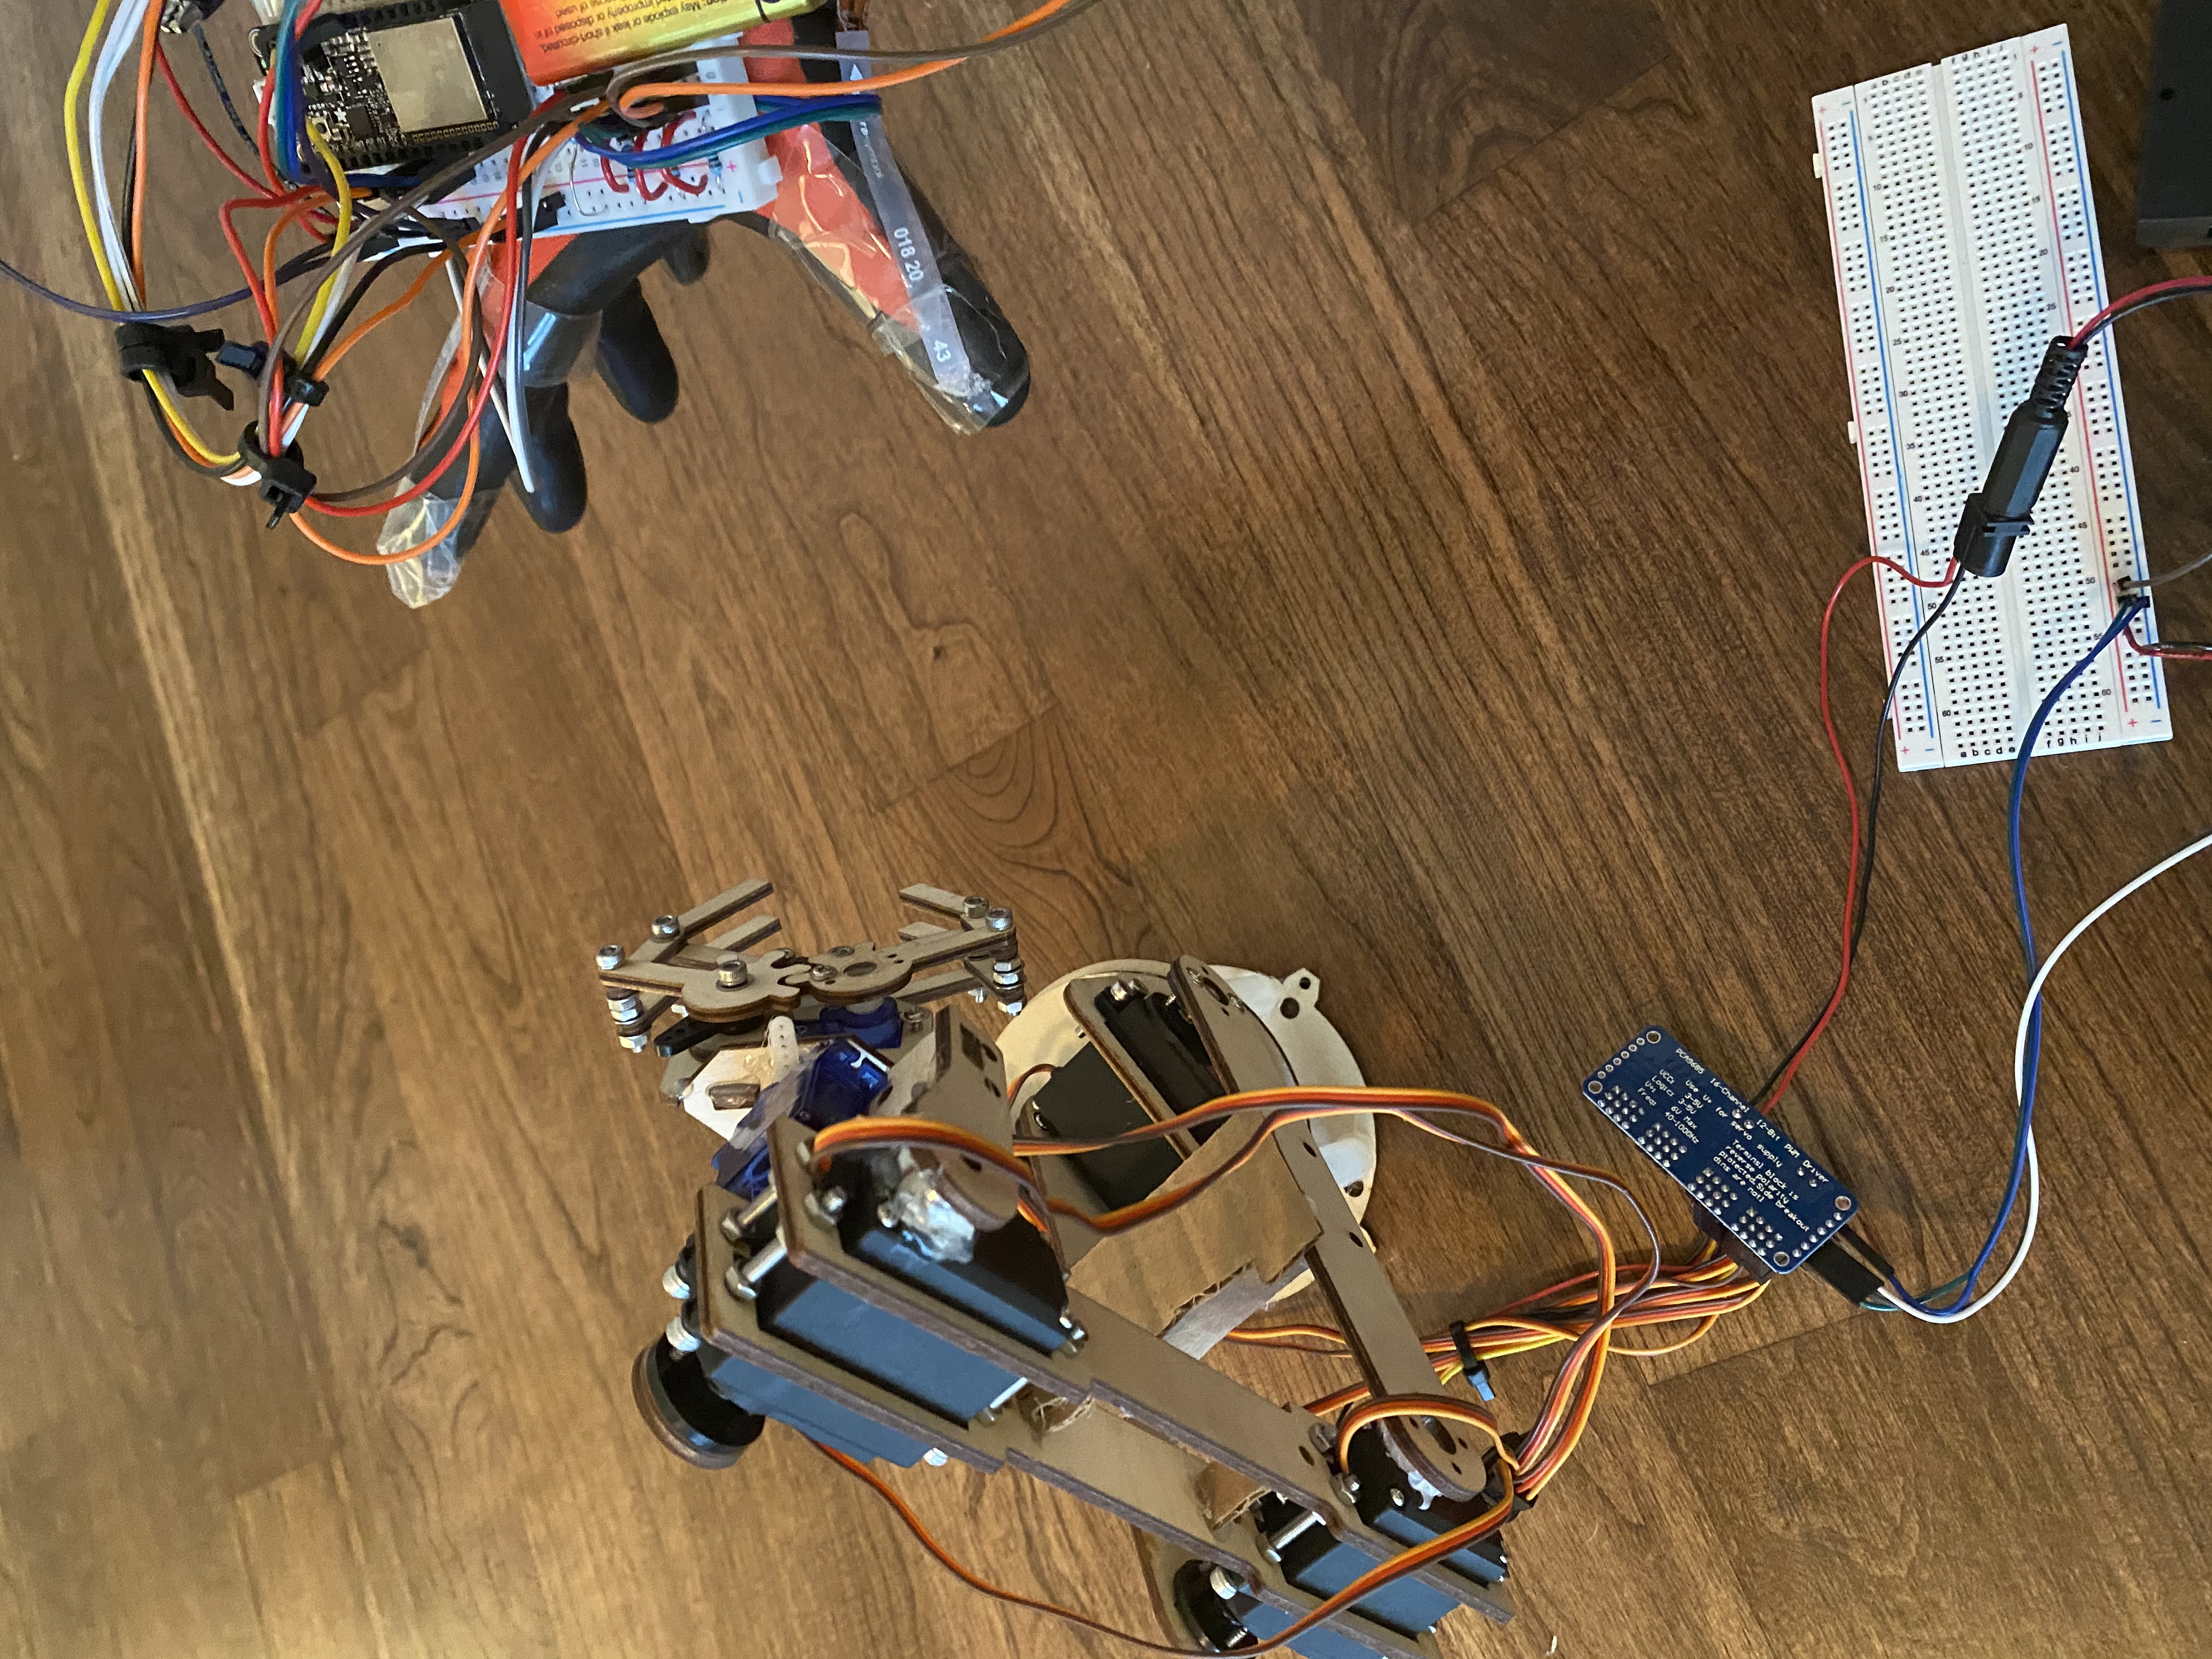
here, my arm is basically done. Later this breaks and I have to reassemble, but it's pieced together the same way and is the one you see in the demo. So, you can count this as the final version.
again, the bluetooth breaks (keep this in mind for the next four photos), and so I rebuild it. But, again, these all are pieced together the same way so it's basically the same thing as the final product in the demo. Here, i'm testing it.
Again, more tests. Notice the wrist isn't fully calibrated, and I had to fix that.
More testing. Working well so far.
More testing!
What Now?
Problems that need to be solved: Some of the issues with this current design is that all of my limbs need to be isolated and can only move one part of my hand at a time for a reaction to be formed. This is pretty awkward, and takes a lot of time. Another issue with this design is that when the base rotates the wires and breadboard gets dragged with the servo motor, which destroys the wiring (I simply took all of the base movement out of the code). Perhaps the largest problem, however, is the lack of balance on the arm. Adding counterweights actually made it worse, and so I left it as is, but it means it cannot get the full range of motion that I would have liked. Finally, the gripper keeps getting loose and I have to retighten it after every use.
Future projects: With these problems in mind, one future project is to make a new arm with my newfound knowledge of this, and create my own CAD that will solve all of these issues currently present. But perhaps the most tantalizing for me is using soft robotics to create a hand controlled by a bluetooth glove. I mentioned this before in the beginning of this page as well. I'm very excited to see where I can go with this now! :)